Update: The Mark III Swale Calculator is here!
Video tutorial:
| Surface | Percentage of runoff |
|---|---|
| Paving, roofs, hard surfaces | 85 to 95% |
| Hardpan | 50 to 70% |
| Bare earth | 20 to 75% |
| Grass | 10 to 25% |
Welcome to the Mark III online permaculture swale spacing calculator. Swale spacing has been a perennial question in permaculture. This calculator creates a template for swale placement based on a logarithmic distribution. It is based on the fact that groundwater flows downward, leaving the top half of hills drier than the bottom. The idea is that water collection should be more intensive at the top of a hill, and be progressively less as you move down the hill.
Why calculate spacing?
Installing swales costs time, energy, and money. Over-installation of swales is a waste of resources. Under-installation is a missed opportunity. If you want to have an optimal system, you’ll need to calculate spacing. The good news is that now it’s easy with our calculator!
How to use this calculator
- You will need to measure the hill from the bottom to the top (or from the bottom accessible boundary to the top accessible boundary, if you hit either physical boundaries or property boundaries). This figure will need to be in metres for the calculator. You can convert units using Google. If you are using an aerial map and are only using the horizontal distance from the bird’s-eye perspective, you will need to convert this to the on-the-ground distance (i.e. the hypotenuse) using trigonometry. (Distance on ground = x ÷ cos Θ where x is the horizontal distance, and Θ is the slope of the hill in degrees.)
- Check the local weather records to see how much rain you can expect in a single large rainfall.
- Input the length of the swale you will build.
- Estimate the slope of the land above the swale in degrees. A mobile app such as Theodolite HD can help here.
- Estimate the percentage of runoff on the site. Use the table above to help you. [Note: If it’s 0%, you can only dig circular swales.]
- Keep in mind that because contour lines are not parallel, the swale spacing will not be uniform across the entire length of the swales. This calculator gives you the best approximation. I do have the the Mark IV in the concept stage, which will address this issue.
- The calculator will return each swale’s location form the bottom of the hill, the volume of each swale, and the cross-sectional area of the swale, which you can use to plan the size of the swale.
- Because of the assumptions built into this calculator, you will need to determine if the volume and cross-sectional area of the top swale is correct or not. You will need to know the catchment area above your swale, and make sure it is big enough to hold all the runoff it will receive.
How spacing works
This calculator assumes you want to capture the maximum amount of water available on a site. There are plenty of times where you will not want to do this. Make sure you know whether swales are going to be helpful or harmful. See An Introduction to Swales and When Swales Can Kill for more information.
Remember that the figures given by the calculator are a guide. There will be an inherent margin of error. Spacing is based off the assumptions that your contour lines are going to be roughly parallel (they won’t be in the real world), and that your catchment area is going to be rectangular in shape (or at least an area with parallel edges). In practice, you might face an irregularly shaped catchment area. The calculator can still serve as a rough guide for you in these instances.
Designing your swale layout
With implementation of earthworks, it is ideal to start at the top and work your way downhill. When designing your plan with this calculator, the figures given (Swale 1, Swale 2, Swale 3, etc.) are from the bottom of the hill to the top. In other words, the first distance for Swale 1 is measured from the bottom of your hill.
Spacing is determined by a logarithmic distribution from bottom to top. This will result in larger, wider spaced swales at the bottom, and closer, smaller swales at the top.
This arrangement makes the most sense in terms of encouraging water infiltration. The water table will drain downward, leaving the top drier. A greater number of swales at the top will allow more water to infiltrate there.
Limitations of the calculator
The question of swale spacing has been an ongoing puzzle in permaculture. A few years ago, it seemed like we had an answer. In Brad Lancaster’s excellent book Rainwater Harvesting for Drylands and Beyond, there is a formula for spacing which in turn cites The Handbook of Hydrology, edited by David Maidment. Unfortunately, the spacing formula isn’t designed to maximize water collection. It gives unit swale volume divided by unit runoff. The problem here is the formula does not take into account the catchment size for the swale. It could have you putting undersized swales at intervals that are not based on the amount of water they will receive. (Testing with the first iteration of this calculator showed this flaw early on.)
The first publicly available online calculator (the Mark II) based spacing on the volume of the swales you built. The problem here is that it did not tell users how to distribute swales across the landscape. This new version provides you will spacing, volume, and cross-sectional area with the minimal amount of input data. That is to say, it does a better job of telling you what to do.
This calculator could be a lot more complicated than it is. It is meant to serve as a good guide to swale design so that you can effectively catch the available runoff without overkill (i.e. without spending more time, money, and effort than you need to spend). It simplifies infiltration rates as a function of runoff. Also, it does not account for hydraulic conductivity (saturated or otherwise), depth to a restrictive layer, and so on. At the end of the day, we are digging a ditch on contour, not launching a spacecraft. Hyper-precision will be a waste of time. It also errs on the side of caution. The volume of your swales at the end does not account for infiltration. This will build some resiliency into your swales. They are better being a little too big than too small.
Behind the scenes
If you want to know what’s going on inside the calculator (and hopefully spot any glaring errors, if there are any), here’s how it works.
- Spacing is determined using log(n+2), where n is the number of swales you select. For a case with 5 swales on a site (i.e. n = 5), we get the distribution shown in the diagram below.
- The runoff above every swale but the top one will be given by the formula: Runoff Volume (litres) = C • ACatchment (m2) • Vrain (mm), where C = Coefficient of Runoff (which is percent runoff ÷ 100), ACatchment is the area of the catchment in m2, Vrain is the volume of a large rain event in mm, and the ACatchment is the Swale Length in metres • Distance to uphill swale in metres.
- Vswale = Runoff Volume
- And Area of swale = Vswale ÷ (Length of swale • 1000). The division by 1000 here is to get us back in the correct units.

This is version 2.0 of this calculator. (But Mark III sounds cooler.)
We’ve got many courses currently in the works and updates to the site, including this page, coming. If you would like to be notified of our updates and courses, subscribe to our mailing list.
eric says
Thanks, this is swell.
Eric says
Haha
Crecencio Elenes says
great job and clear thanks
John Freeberg says
Douglas — nice calculator, thanks. What is a simple way to use government websites or Google Earth to generate a contour map of my farm? John F
Douglas Barnes says
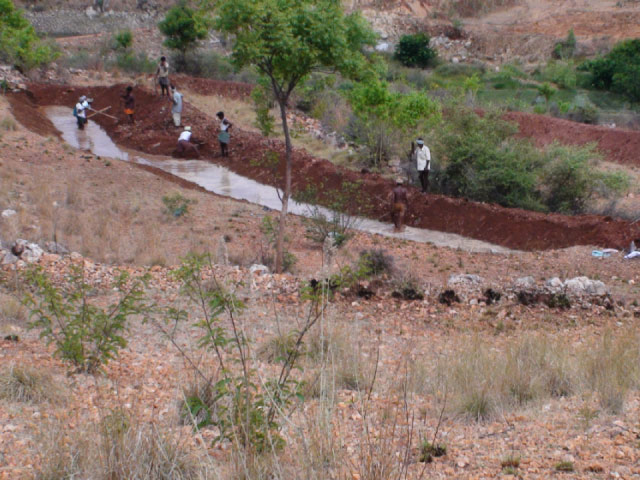
John, what I like to do is mark out contour on a site, then pop in the points on a GPS. If I am using an online map like Google Maps (or Bing), I make sure to mark two prominent landmarks like a driveway, or what have you.
Then transfer the points to a map on your computer (my aging Garmin does). I then take the map of the points and overlay them in a graphics program, rotating and scaling until the landmark points are properly positioned. I then paint the dots together to map out the contour. The image above of a project I did in AP, India was made that way.
Will says
Hi John,
You can create contour lines in Sketchup from Google Earth topography using the steps in this tutorial: https://www.youtube.com/watch?v=tk-Mc2uWHfI
I use this often for help in visualizing a property, understanding water flows, and estimating swale parameters.
While the contours generated from this process are only general indications of the actual property’s topography, they do help by establishing a general baseline from which to take more accurate measurements on-the-ground.
Douglas Barnes says
Nice! I’ve used SketchUp a lot, but never in this way. Thank you!
Kevin Young says
Douglas, thanks for your articles on swales (and when not to use them), and this great calculator! I see a lot of confusion about swales–people asking about how they can do swales in their little backyard garden, for example. Thanks for helping demystify this tool!
Michael Newby says
Like the calculator but I feel like it could really use a reset button. Thanks for the great article.
Douglas Barnes says
Good suggestion, thank you.
Douglas Austin says
I am looking to put swales in on my hillside and need to know exactly how to build them. The hill is about a 15 m rise and I have about 10 rows each about 50 m long.
How do I figure out what I need and how deep to dig the, how wide, how many, etc.
I’m in Los Angeles.
Thanks,
Doug
Douglas Barnes says
I might be able to steer you in the right direction, but I can’t consult without seeing the site. If you have trouble, you’ll want to get a local designer out to help you. They can help you to know when swales are a bad idea, or help you out of trouble spots you might face with implementation.
The height of your hill is not really an issue, it’s the slope. If the slope is greater than 20º, you shall plant trees. Not only does it become risky to work on slopes over 20º, you also get little in the way of return with respect to how much earth you move in relation to how much water the swale can hold.
If you want to go by ten rows of swales (if I follow you correctly), you’ll need to work out the spacing you want (you will probably want swales more closely spaced at the top, as mentioned in the article). For the top swale, you will need to know the catchment area. You’ll want the top swale large enough to hold the runoff from that area (with a little breathing room, of course).
Then if you know the distance to the next downhill swale, calculate the catchment area and how much runoff it will have. You can find this with
Runoff = Area (m^2) * (Percent runoff)/100 * Rainfall in one event (mm)/1000
Your Runoff will be x m^3 that will flow into the swale.
Next, take Runoff ÷ Length of swale (m) to get the Volume per m. You can take this figure and use it as your swale’s cross sectional area to know how big its minimum size can be. (Again, go a little bigger for breathing room.)
In this way, you can design from the top down. (And I now have a project to turn this into another version of the calculator, for which I thank you.)
For anyone wondering why you might want to start with a set number of swales on site, it can allow you to set the number of points where you allow water infiltration to make it more even. The greater the number of swales, the more even water will be distributed down the hillside.
Fshah says
Runoff needs to be multiplied by cosine(slope in degrees). Additionally, allowance for absorption by the loose swale itself must be provided for realistic scenario. This allowance will increase distance between swales OR corresponding increase in wale section if distance is fixed.
Douglas Barnes says
I don’t want to overly complicate things. When you compare the difference in the final calculations, it will be dwarfed by irregularities in in the swale’s cross-sectional area in many cases. Also, there is increased infiltration in the swale as opposed to infiltration with the bank soil conditions. That’s a level of accuracy that I don’t think is really necessary. One thing that I didn’t build into the calculator was a factor to actually pull the distance in shorter so that the swale capacity was greater than the catchment (in the interests of a more resilient swale).
Kim Usher says
Aloha,
Have you heard about the Ohia forest in Hawai’i die off?
In 1970 they learned that a fungus would start in the areas that were cleared to grow papaya by these old native forests…In the 90’s GMO papaya started with no forethought on what happened in the past.
Do you have any suggestions that may help to control the areas that are being hit?
And help other areas to remain healthy?
Thank You
Douglas Barnes says
From what I see, the spread is still not understood. With respect to swales, or earthworks in general, I don’t think they will have any sort of a protective effect.
http://apsjournals.apsnet.org/doi/full/10.1094/PDIS-12-14-1293-PDN
http://www2.ctahr.hawaii.edu/forestry/disease/ohia_wilt.html
Robyn Francis says
Re number of swales on a slope, PA Yeomans strongly recommended to never put more than 7 swales in a sequence due to risk of hypersaturation of the soil. He also suggested that a spring could eventually form in the seventh swale, which may not be ideal in many situations.
Douglas Barnes says
Hi Robyn. I hope your hand is feeling better.
You make a good point here. I am rolling the idea around in my head for some sort of a template system for swales. When I figure it out, and find the time to write it up, I’ll post it here.
Lukkas says
How exactly is the cross sectional area supposed to be in Meters Squared? The cross section is a flat measurement from one side to the other, getting Meters Squared mandates calculating the length of the swale which is accounted for elsewhere in this calculation…
Douglas Barnes says
Area (see the first diagram) is in metres squares. Volume (i.e. with length) is in metres cubed.
Kelly says
Hi i realize this is a very old post but i am pulling my hair out with this exact question, well somewhat, and can’t find the answer in the post or in the comments. How do we know from the calculation how deep each swale must be? for example in my scenario using your calculator the 1st swale is to be placed roughly 48m from the bottom with a volume of 92916 litres and a minimum cross sectional area of 3.0972m squared. How do i calculate the depth of each swale from this info??? is the cross sectional area a reference for width of the ditch upslope from the berm??? Your calculator seems so cool and i appreciate that you took the time to invent it and make it available but im just not understanding how to use it to determine the depth of each of my swales. Thanks for any clarification. Have a nice day
Mitchell says
Hey Doug, I’m in the planning stages of our site and our property is on a slope near the bottom of the hill, how would I calculate for this considering the calculator is geared towards the assumption that you are putting in swales right from the top of the hill? As the top of the hill and the other 3/4 of the slope down of it are someone else’s property this is not an option. Any suggestions?
Douglas Barnes says
Hi Mitchell. You can apply the same pattern on your section of hill. Just pay attention to how wet things are at the soggier times of year.
I have an article coming out in Permaculture Design Magazine that looks at things in more detail, with more focus on where you don’t want swales.
Yener HASTAN says
I would really love your help with a project. It’s about a 15000 m2 area. Very arid no trees no vegetation almost desert.
The plan is to bring it back to life with swales and ponds.
If you could help with swale and pond placement it would greatly help. Storing water on the lan is of upmost importance as rain is only around 150 to 300 mm a year. There is a small river entering the site from the north and exiting straight out of the south.
The soil is mostly clay. When it rains small rivers form everywhere and the mud gets so sticky you get your boots stuck in it. The small rivers soon stop right after the rain. So alot of runoff but not much infiltration.
Here’s a topographical map of the site
https://drive.google.com/file/d/0B-SkKoJuefl4WkF1TmFoSkpHUGlmYlBxZEJoLU0tS1JwNmNR/view?usp=drivesdk
Thank you
Luc says
Hi, using the cross sectional area how do I calculate the width and height of my swale?
cori says
The Calculator is not working. 🙁
Marc Stubbs says
Hi there this was asked above but I am wondering best way to calculate the width and height of swale using the cross sectional area?