The following interactive infographic gives highlights of the recent ridgepoint dam construction at Circle Organic Community Farm.
Learn sustainable design
The following interactive infographic gives highlights of the recent ridgepoint dam construction at Circle Organic Community Farm.
Update: The Mark III Swale Calculator is here!
Video tutorial:
| Surface | Percentage of runoff |
|---|---|
| Paving, roofs, hard surfaces | 85 to 95% |
| Hardpan | 50 to 70% |
| Bare earth | 20 to 75% |
| Grass | 10 to 25% |
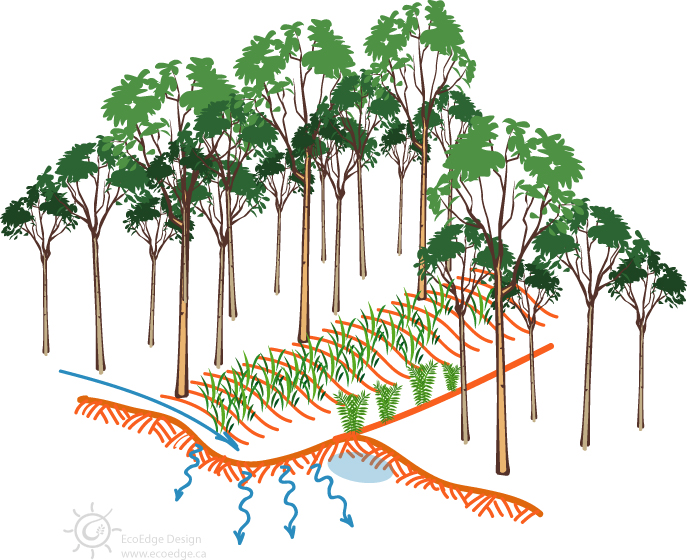
Welcome to the Mark III online permaculture swale spacing calculator. Swale spacing has been a perennial question in permaculture. This calculator creates a template for swale placement based on a logarithmic distribution. It is based on the fact that groundwater flows downward, leaving the top half of hills drier than the bottom. The idea is that water collection should be more intensive at the top of a hill, and be progressively less as you move down the hill.
Installing swales costs time, energy, and money. Over-installation of swales is a waste of resources. Under-installation is a missed opportunity. If you want to have an optimal system, you’ll need to calculate spacing. The good news is that now it’s easy with our calculator!
This calculator assumes you want to capture the maximum amount of water available on a site. There are plenty of times where you will not want to do this. Make sure you know whether swales are going to be helpful or harmful. See An Introduction to Swales and When Swales Can Kill for more information.
Remember that the figures given by the calculator are a guide. There will be an inherent margin of error. Spacing is based off the assumptions that your contour lines are going to be roughly parallel (they won’t be in the real world), and that your catchment area is going to be rectangular in shape (or at least an area with parallel edges). In practice, you might face an irregularly shaped catchment area. The calculator can still serve as a rough guide for you in these instances.
With implementation of earthworks, it is ideal to start at the top and work your way downhill. When designing your plan with this calculator, the figures given (Swale 1, Swale 2, Swale 3, etc.) are from the bottom of the hill to the top. In other words, the first distance for Swale 1 is measured from the bottom of your hill.
Spacing is determined by a logarithmic distribution from bottom to top. This will result in larger, wider spaced swales at the bottom, and closer, smaller swales at the top.
This arrangement makes the most sense in terms of encouraging water infiltration. The water table will drain downward, leaving the top drier. A greater number of swales at the top will allow more water to infiltrate there.
The question of swale spacing has been an ongoing puzzle in permaculture. A few years ago, it seemed like we had an answer. In Brad Lancaster’s excellent book Rainwater Harvesting for Drylands and Beyond, there is a formula for spacing which in turn cites The Handbook of Hydrology, edited by David Maidment. Unfortunately, the spacing formula isn’t designed to maximize water collection. It gives unit swale volume divided by unit runoff. The problem here is the formula does not take into account the catchment size for the swale. It could have you putting undersized swales at intervals that are not based on the amount of water they will receive. (Testing with the first iteration of this calculator showed this flaw early on.)
The first publicly available online calculator (the Mark II) based spacing on the volume of the swales you built. The problem here is that it did not tell users how to distribute swales across the landscape. This new version provides you will spacing, volume, and cross-sectional area with the minimal amount of input data. That is to say, it does a better job of telling you what to do.
This calculator could be a lot more complicated than it is. It is meant to serve as a good guide to swale design so that you can effectively catch the available runoff without overkill (i.e. without spending more time, money, and effort than you need to spend). It simplifies infiltration rates as a function of runoff. Also, it does not account for hydraulic conductivity (saturated or otherwise), depth to a restrictive layer, and so on. At the end of the day, we are digging a ditch on contour, not launching a spacecraft. Hyper-precision will be a waste of time. It also errs on the side of caution. The volume of your swales at the end does not account for infiltration. This will build some resiliency into your swales. They are better being a little too big than too small.
If you want to know what’s going on inside the calculator (and hopefully spot any glaring errors, if there are any), here’s how it works.

This is version 2.0 of this calculator. (But Mark III sounds cooler.)
We’ve got many courses currently in the works and updates to the site, including this page, coming. If you would like to be notified of our updates and courses, subscribe to our mailing list.

Simply put, swales are ditches dug on contour. Being level, they are not designed to transport water from one place to another. Rather, their intention is to allow water to soak into the ground.
The term “swale” is a little confusing, as it is used in landscape architecture to describe a grassy ditch designed to gently drain water from an area. In permaculture, however, the term means a level water-harvesting ditch.
Swales stop runoff, allowing water to sink into the ground. The effect generally raises the water table. This makes them useful in supporting trees, and as part of a broader water-catchment strategy for a site. It should be noted, though, that many fruit trees do poorly in areas with a high water table. You will have to consider where you are installing swales, and to what end.
Swales can be used on sites with slopes from 0º up to 20º. Even seemingly flat sites can have circular swales used to capture water. On slopes greater than 20º, it is not only unsafe for most machinery used to dig swales, the volume of earth moved versus the volume of the swale makes swale construction inefficient. A smaller volume swale has a smaller catchment area, requiring more frequent spacing of swales. (See the graphic below and the Swale Calculator for more.)
Click “Animate” on the graphic below to see the effect of slope on volume.
Note that as the slope increases, the volume of the swale decreases.
Firstly, swales are aimed at supporting trees and raising the water table. If you want irrigation for a vegetable garden, swales are not the way to do this. In many, if not most cases, the water captured by swales would penetrate too low to benefit garden crops. Additionally, most garden crops will not tolerate the water table within 30 cm (1 foot) of the surface for more than 24 hours. This is why farmers are willing to spend tens of thousands of dollars on carefully engineered drainage systems. Too much water is as bad as too little.
Secondly, there are situations in which swales can cause damage to property or even loss of life! As always, you will have to design with safety in mind. For more on this topic, see the article “When Swales Can Kill.”

If you’re reading this, you probably love water-harvesting earthworks. When done right, they can start repairing damaged land right from the first rainfall after they are installed. When done wrong, they can waste a lot of money, or even put lives and property at risk.
Here are six things to keep in mind when planning earthworks for a site.
The point of harvesting water is grabbing it and holding it as long as you can before it escapes you by going off your site. The longer that water stays on site, the longer it is available to you. Whether you are choosing open storage, or directing it into the ground, your aim is to make it stay around longer.
It’s worth mentioning a curious misconception that some people have. Some folks have the idea that if you slow water on your site, you are taking it away from anyone downhill, leaving them with less water. This is not at all the case at all.
Allowing runoff rather than capturing it is generally a no-win situation. To regreen a water-starved place, would you encourage water to rush down off the hills as quickly as possible so that all the downhill people could have it? This, in essence, would be designing the land to make water travel out to the ocean as quickly as possible. Not only is this a recipe for erosion, it is a recipe for turning permanent rivers and streams into ephemeral ones that only flow during heavy rains.
 With earthworks, you are rehydrating the landscape. Rehydrating the landscape means more water available more often for the people downstream. While they might see a temporary reduction in surface runoff in the short term, in the medium and long term they will have more groundwater available.
Nature will throw enough adversity at you without adding to the list by creating your own disaster. A good risk assessment will help you to make wise decisions. Here are some questions to keep in mind before bringing in the machines.
Though you may be eager to install a particular feature on a site, safety might dictate that you walk away and leave the site untouched.
You might have some exciting ideas about what you would like to see installed on a piece of land, but it is not going to work out very well if the earthworks do not suit the site you are working on.
A great perspective to take when deciding what to do is taking the land’s perspective. What does the land want to do? To answer that, consider what the environment was like before human intervention. That will give you some insight into the most optimal techniques to use on your site.
What the land will do depends on:
Consider what the site would look like if it were just left alone for 40 years. How would it change over time?
Once you know the direction the land will naturally head, you can choose an approach that will steer it in that direction, rather than fight against what the land naturally wants to do. Nature rewards partners and punishes dictators.
Bruce Lee wanted you to have a mind like water. I want you to think like water.
If you are water there are a few things you will do such as evaporate, or freeze, but the most important one with respect to earthworks is that you travel at 90° to contour. To put it another way, you flow downhill. (It’s true that if you are flowing through something, you will favour easily traversed mediums like sand over something denser like clay. In this case when travelling through soil, you might go at an angle less than 90o to contour. For planning purposes, however, 90° to contour is the rule.)
With this in mind, how will you, water, travel across the land? What path will you take? Check the land. There might be clues as to where you have travelled before – evidence of erosion, or of sediment building up. This can help you to make decisions of what to place where.
How much water will there be at one time? Not only do you need to know where the water does and doesn’t go, you also have to know how much there is at one time. How big do the water-harvesting systems need to be? What happens if you get more water than expected?
There are a lot of choices when it comes to earthworks, choosing the right one for a site means that your efforts will go further
If you read your site correctly, it will go a long way towards determining what you can or should do on a site. Soil type, for instance, will determine what will be effective and what will not. As an example, ripping with a subsoiler such as a Yeoman’s plow can be very beneficial. It would be pointless to run one on sand or on lateritic soil, however. In the former case, the sand will just fall back in on itself. In the latter case, the land will flow and “heal” the ripping with the first rainfall (assuming you had the horsepower to get the power to break through the soil in the first case).
Next, you need to know what each type of earthwork does. For example, swales intercept water, sending it into the ground. They are great for sending runoff into the ground and helping trees to establish, but they won’t do much of anything at all for garden beds.
Do you want to get more water in the ground, or do you want open water storage? The answer will depend on your climate and what you are trying to do. If you were in an arid environment, you wouldn’t want a lot of open water storage, which would just be subject to evaporation. If you were in a humid temperate or tropical climate, open water could provide backup irrigation as well as opening space for aquaculture.
You can make a grand plan, but do you have the money to pay for it? You might have to implement things in stages. Hiring a tractor to pull a subsoiler is very affordable. Digging swales is affordable and has a high return on investment, if you are using them for the right thing in the right place. Installing a dam is a higher investment that will take considerable machine time, and thus more money.
You also have a choice of machines to work with. The hourly rate of a backhoe is cheaper than that of a bulldozer. If you are in a humid temperate environment, you can cut in a swale with a bulldozer in a small fraction of the time a backhoe could. If you were in a semi-arid environment with hard, lateritic soils, even if you could cut through with the dozer blade, the swale you made would be far too small and would just be erased with the first big rain event.
What approaches do you take when designing water-harvesting earthworks? What snags and solutions have you encountered with your projects?
Sensationalist title, yes, but unfortunately swales can cause damage, or even loss of life. When designing and building earthworks, “Don’t kill people” should be your first rule. I’m going to highlight 3 situations in which these water-harvesting earthworks could be dangerous and perhaps even fatal.
The swale is a water-harvesting ditch on contour.
When I get a call from a client who is east of me inquiring about earthworks, I immediately head for a soil map. The reason is that much of Eastern Ontario was covered by the Sea of Champlain around 10,000 years ago. Here silt, clay and organic matter were deposited in the sea’s saline environment, leaving a deposit of a particular kind of clay known as Leda clay, quickclay, or Sea of Champlain clay. The salt in the water acted as a cohesive agent. When the sea disappeared, this clay was then exposed to fresh water from rainfall, washing away much of the bonding properties of the salt, leaving the very unstable structure of the Leda clay.
Under pressure, or sometimes when highly saturated with water, Leda clay can liquefy – something which has triggered a number of landslides in Eastern Ontario. If you place a swale somewhere, you are going to make the ground downhill of the swale wetter. This creates conditions that could make the ground unstable, triggering a landslide.
So what do you do in this situation? I don’t have any set rules. I look at the need for swales and if other approaches would suffice. I also look at the slope and the likelihood that the land might slide. (Keep in mind that these slides can cover a lot of area and might start a long distance off site.)
In some situations, swales just might help prevent damage. Leda clay contracts a lot when dry, which can lead to foundation damage. If sliding is not a danger, you might help a building keeping the ground hydrated with swales. Personally, I’d look to preserve moisture with mulch and ground cover in those situations, just to be safe.
In short, Leda clay makes me nervous. I’ve yet to install or recommend any swales in these situations. If you’ve had any experience dealing with quick clay, I’d love to hear about it in the comments, or via the contact form.
Video by Christian Olsen.
Swales can trigger landslides in tropical highlands. These hilly areas get tremendous volumes of rainfall. Forcing more water into hillside soils in these regions can trigger a slide, even when they are forested. Consider the following passage from Jared Diamond’s Collapse:
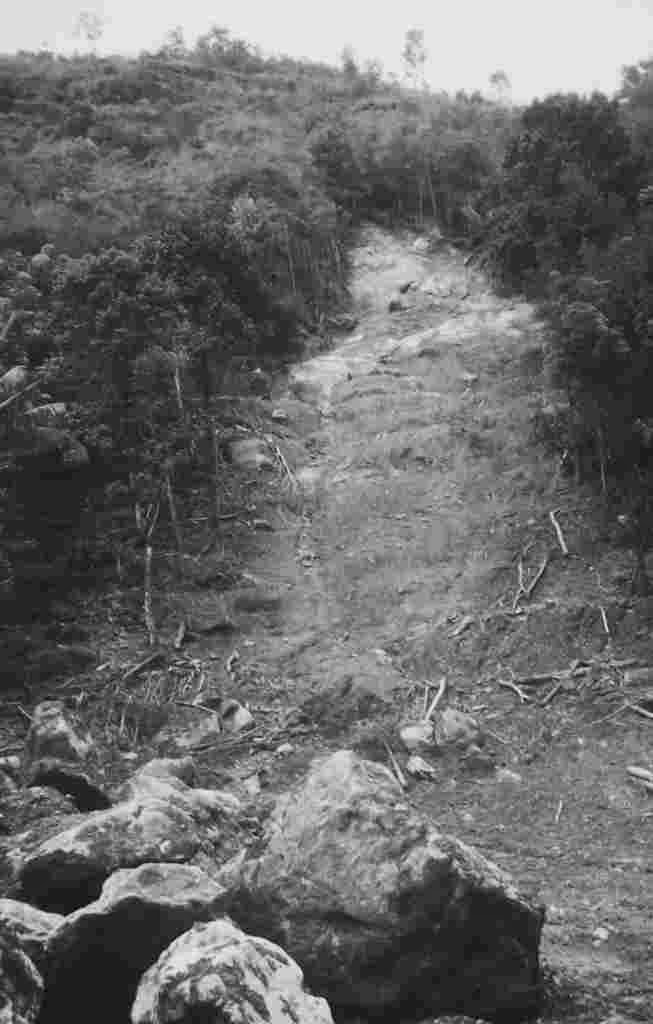
Image of tropical highland landslide by Radhakrishnansk
[O]ne European agricultural advisor was horrified to notice that a New Guinean sweet potato garden on a steep slope in a wet area had vertical drainage ditches running straight down the slope. He convinced the villagers to correct their awful mistake, and instead to put in drains running horizontally along contours, according to good European practices. Awed by him, the villages reoriented their drains, with the result that water built up behind the drains, and in the next heavy rains, a landslide carried the entire garden down the slope in the river below.
These are areas of 3 or more metres of rainfall a year. There’s no problem with available water in these regions. Don’t risks potentially deadly landslides by floating mountainsides with swales.
As mentioned above, swales make the area downhill of the swale wetter. I had someone near the waterfront in Toronto contact me a few years back about doing some work on her property. Her house was at the bottom of a bluff, and she was wondering about swales above her home to keep the water out of her basement in the spring. In this situation, there was the increased risk of sliding, as well as a good guarantee that spring flooding would be made much worse. Sometimes the best advice is not to do anything. I was happy not to ruin her home with swales and I suggested some drainage to carry water away from the uphill side of the home.
The following is a write-up of my February 1 presentation at the Guelph Organic Conference. Many thanks to the event organizers and staff, my fellow panellists, and most importantly to the wonderful, engaging audience.

We are fortunate to live in a climate that is relatively abundant in water. The disastrous drought of 2012, however, shows us that we can no longer afford to take water for granted. Globally, nearly half of all land is arid, with a further 25% threatened with desertification. That’s the bad news.
I’m here to tell you the good news. I’m here to tell you about how, with a fraction of the time and energy we have spent degrading our environment, we can foster life and increase biodiversity. And we can do it profitably.
Let me jump right into the “how.” The “how” is based on a few design strategies. One of those strategies is to hold onto the resources we have on site as long as possible. In the case of water, we hold onto it in two ways. One is to put it through as many duties as possible before it is lost to us. The approach we are focusing on today, however, is to capture the water arriving on site, and take it over the longest, and slowest path practical.
Putting this approach into practice means starting at the highest elevation on a site and working downhill with the techniques I am about to highlight.
To hold water at the top of a site, we typically forest hilltops and ridges, along with steep slopes. Forests are very effective at capturing water with minimal runoff. They also have the added benefits of preventing erosion, and adding fertility to the top of a site where it can naturally flow downward. This is a strategy hit on by the Japanese in a traditional mountain region farming system they call Satoyama. Admittedly, this is not a form of earthworks, but it is so integral to water harvesting design that I would be remiss not to mention it.
Water harvesting earthworks have the goal of intercepting runoff water, and storing it. The simplest of the interception techniques involves patterned ripping of the soil with a subsoil plow, given the right soil conditions. With the plow, we cut narrow furrows into the ground just slightly off contour to capture runoff and gently direct it from wetter areas to drier ones. Originating in Australia, this technique has proven very effective there.
This type of interception technique is also really a storage technique as well. The ground is a fantastic place to store water. There it is largely free from evaporation while being available to plant and soil life.
Another common interception technique is the swale, which is a water harvesting ditch dug level on contour. It stops water flowing downhill, allowing it to sink into the ground.
This is a good point to address an argument that too often comes up around water harvesting. Sometimes you will hear a claim from downhill people that you are “stealing their water.” Nothing could be further from the truth. They might see a temporary reduction in runoff onto their land as you hold onto more of your water, but, as you recharge the water table, the medium and long term effect will be to increase the local ground water. In many cases, ephemeral streams will start to have a more regular or even constant flow.
Both of these interception and infiltration techniques are inexpensive and cost effective to install.
Swales are also used in conjunction with earthen dams and ponds. The dams we are talking about are small reservoirs sealed with clay, not concrete structures. Both ponds and dams provide water for irrigation. They can also be put to productive use through aquaculture. While our climate does not support a very large variety of productive aquatic crops, warmer climates can produce prodigious quantities of edible and palatable plants. And even in our climate, water has a better feed conversion rate than terrestrial livestock. For instance, it generally takes 870 grams of feed to produce 100 grams of beef, or 190 g of feed to produce 100 g of chicken. The feed conversion rate for fish, however, is typically 120 g of feed to 100 g of fish.
Aquatic systems are also excellent producers of soil. Their periodic need for dredging yields a very valuable product that adds to site fertility.
In semi-arid and arid conditions, we sometimes employ a land imprinter – essentially a large, patterned drum which can break through desert hard pan and leave divots in the earth. Here debris, including seeds, will collect and moisture will concentrate during rains. This simple approach has proven effective in re-establishing grasslands.
Dug pits can work similarly to establish drought-hardy trees in semi arid conditions.
This has been a very rapid summary to give you a taste of some of the techniques we use. I’d like to leave you with a brief case study of the most dramatic work I have been involved in.
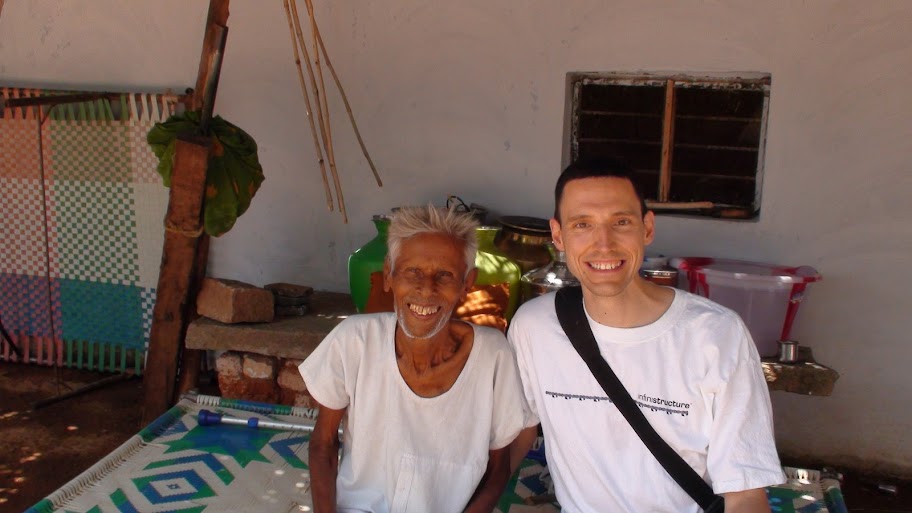
In 2009, I received an invitation to carry out a joint project with a local NGOin Andhra Pradesh, India. This region had traditionally had a dry tropical climate. In recent decades, however, it has grown increasingly arid at an accelerating pace.
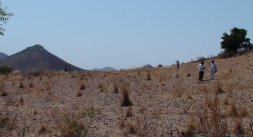
When I finally arrived, I found the situation on the ground to be quite bleak. The vegetation is starting to give way to cacti and other desert xerophytes. The local village I worked in now has to draw water from a well over 1000 feet deep, the water from which is tainted with excessive amounts of naturally occurring fluoride.
Before leaving, I’d had it in mind to employ a number of techniques, including ripping the ground with a subsoiler, and building a dam. The soil conditions only lent themselves to swales, however.
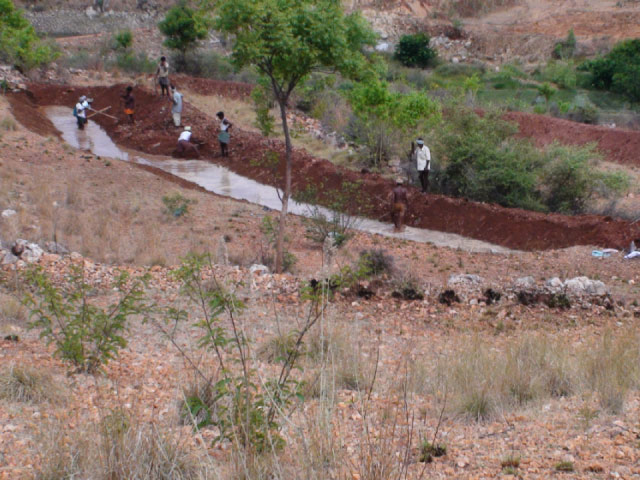
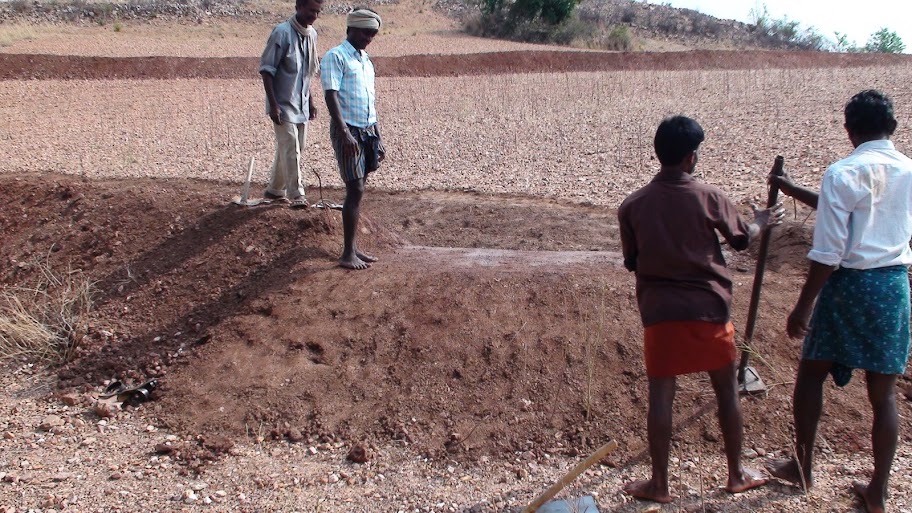
I was given carte blanche over 7acres of arid hillside that a local mango farmer considered a write-off for everything except a seasonal crop of pigeon peas.
After crunching some formulas, we laid out contour lines on three levels, then excavated over 400 metres of swales, capable of holding over 1 million litres of water. Our host farmer was initially dismayed to see us chewing his land up, but started to get the gist of what we were doing. The night before we were to complete the project, a pre-monsoon storm hit, so when the rains hit, he took off on his motorbike, and headed to the site. He was delighted to see that all the water that would have washed down the hillside, and eventually out to sea, was now stored in the ground.
Before I left, I made what I thought was a bold prediction. I said that within 3 years time, there would be springs appearing at the bottom of the hill during the monsoon season. It turns out that my predictions were very conservative.
Six months after I left, I received a photo update of the site. In it, I saw that they had established mango seedlings, and they had managed to do it without drip irrigation – something very unusual even on flat sites in the area.
Tamarind trees on the opposite side of the valley had a very anemic crop, whereas a tamarind tree adjacent to the swales produced an unusually bountiful crop.
I’d made my bold predictions of springs appearing within 3 years. At the bottom of the site there had been a well with water 3 metres down while I was there. Now six months later, the well was full. Water is no longer an issue on the site. And what had been a meager pigeon pea field is now a lucrative mango polyculture.
The results were beyond my most optimistic expectations, and the cost of the immediate project was just $650 Canadian. This is really a prime example of how the cost, effort and time it takes to repair a site is far less than that required to destroy it in the first place. As soon as we pattern our actions in harmony with nature, the payoff is immediate.
These techniques have proven effective everywhere from arid desert to tropical rainforest. They help to rejuvenate drylands, and buffer against drought. We can expect increasingly erratic weather in our future, including severe drought. These water harvesting approaches can help us through the rough times to come, and they can replenish our water tables during the good years.
At the invitation of the Green Tree Foundation, I visited the town of Talupula in the drought-stricken Anantapur District in Andhra Pradesh. Once a dry tropical region, biotic pressures have changed the region into an arid landscape. Because of this, the Green Tree Foundation had me come in to design and implement water harvesting systems suitable for their area in an effort to assist with their regreening activities.
 Having selected a site for our project, I mapped the boundaries of the site with a GPS unit, and assessed the site’s features and vegetation. Being ferrosols, the soil structure was generally pretty uniform from the surface down to as much as 8 metres deep. And being gravelly, it was not appropriate for dam construction. This meant we would stick to swales for this site. The cost of digging the swales was well within the total allotted budget for the project, so we next looked into choosing the best machine for the job.
While digging out swales with a bulldozer with a tilting blade can be a convenient way of making them, the soils were so hard that they would have created a near impossible situation for the dozer to handle. Add to that the fact that the nearest dozer would be 6 to 8 hours away, requiring a transport fee, and that they would only come out for more than 100 hours work, bulldozers were not an option anyway. We were left with the choice of a backhoe or a small excavator. The excavator had speed going for it, but availability was a problem (we would have access to it only one day a week). It also required transport to the site (increasing its cost) and was 35% more expensive than the backhoe. The backhoe looked to be the best choice by far.
Designing the water-harvesting system, I did not want the site to be plagued by undersized swales. For one thing, I wanted them to be able to hold a lot of water before excess would go over their spillways. Also, if they did not have gradual enough walls, they would be more prone to erosion. Over time, swales gradually fill in, too. With larger swales, they would be around longer.
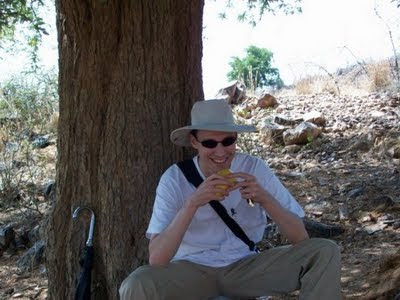
The designer enjoying a fresh mango under a tamarind tree that saved him from heat stroke many times. Photo by Gangi Setty of the Green Tree Foundation.
As I wanted the swales to be around 1 metre from the bottom of the trench to the top of the mound, I designed the trench to be about 4 metres across (a little smaller on two of the swales) and about 4 metres across on the mound. The site was nearly devoid of vegetation, so to be on the safe side, I assumed 55% runoff, meaning a coefficient of runoff of 0.55. To determine the spacing of the swales, I used the formula
Spacing = Holding capacity per m ÷ (Runoff coefficient X Maximum rainfall in one event)
[Please note that this formula is flawed. We have a swale spacing calculator on the site to make your calculations for you.]
The volume of the swales per metre was to be around 1.7 cubic metres. The maximum rain in one large event in the area is 10 cm. From this, I calculated the approximate spacing for the spaces at 30 metres. Using the GPS, I was able to find the level for the second swale, 30m down from the top, then the 3rd level, 30 m down from there.
 We needed to map out the contour sites, so we tracked down some local engineers with a dumpy level. It turns out that the engineers owed a friend of the landowner a favour, so they came out to the site for free and mapped out the contour points for 4 swales on 3 different contours. While I planned on mapping the site myself, their proficiency had them finishing the mapping in half the time it would have taken me. They put us ahead of schedule by one day.
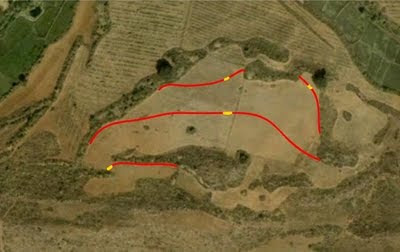
The map of the site showing the swales in red and the level-sill spillways in yellow.
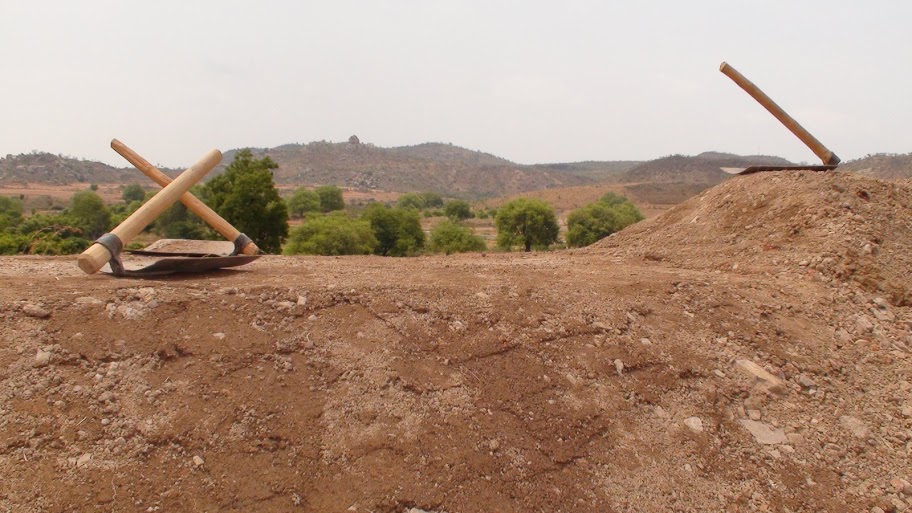
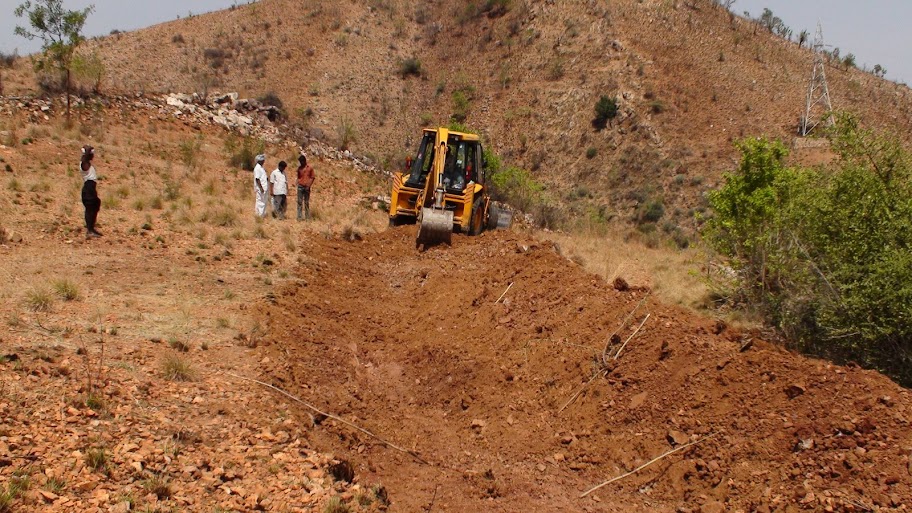 The swales were excavated without too much incident with the total excavation taking about 3 and a half days to move 600 cubic metres of earth. We didn’t have the backhoe do everything. We simply had it dig trenches 3 metres wide and 50 cm deep, placing the excavated earth on the downhill side of the trench. The rest we were leaving to be groomed by hand. At one point, we hit rock that would have taken hours for the backhoe to chip through. In such cases, it is simplest to try to go around either uphill or downhill around the rock. We opted to go uphill. Apart from that one little snag, the rest of the excavation went as quickly as one could expect considering the soil was nearly as hard as concrete.
 We hired a team of ten labourers to groom the site. Because the soils were so hard, however, we had the backhoe come back and chip off the uphill edge of the trenches it dug to make the process faster. The first day of grooming was gruelling work for the work team. They had to rely on picks to be able to chip through the earth to smooth out the edges of the swale. Grooming the mound was much easier as the soil there was already broken up. In the end, I had hoped to get the mounds groomed to a more gentle slope while the workers were there, but time ran out before we could get everything as perfect as the ideal I held in mind. Still, the edges are not steep and erosion should not be a problem.
On the night before the final day of work, the heavens opened up and released a torrent on the site. Excited to see the swales in action, the landowner rushed out in the middle of the night to see them fill up with water that would otherwise have washed down the hill in an erosive flood. When I arrived on site the last day, the top swale and one of the lower swales were full of water due to the slower infiltration from their slightly higher clay contents. Already they were a home to some very happy frogs that, with the rains, had come out of hibernation.
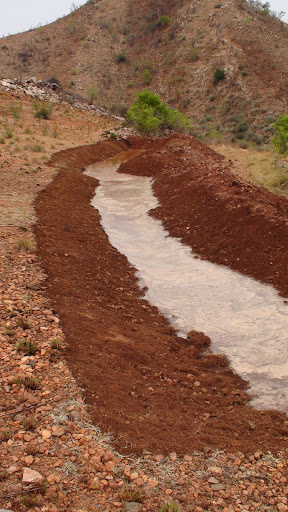 The rains transformed the earth from a concrete-like surface to a soft and yielding one. This made the final grooming much, much easier. In order to help make the swales more durable, I had the work team put in compacted, level-sill spillways set at 90 cm from the bottom of the swales. With them in place, water can spill gently over the top in very heavy rains, greatly reducing the chance of erosion damaging the swales. The workers seemed to get a kick out of me inspecting the spillway with a site level and having them fix spots that were a few millimetres out. While it may seem fanatical, if the spillway is not dead-level, flowing water will concentrate in the lower spots. When it is concentrated, it moves faster, and when it moves faster, it has more erosive potential.
Workers compacting the soil to create a level-sill spillway to allow overflow without eroding the swale.
Since the monsoon season hit just as the project was completed, it started collecting water right away. Within three weeks of the completion of the swales, they had already captured and saved over half a million litres of water. The land owner was initially worried about the amount of land that the swales took up – land that would otherwise have been dedicated to the mango tree crop that is to go in later. But upon seeing the results of the swales in action, he knew they were the right thing to do.
I was very fortunate to have the agroforestry expertise of the Green Tree Foundation to assist in the selection of tree species from the site. The plan was to plant a windbreak crop and living fence consisting of Gliricidia sepium, Caesalpinia crista and Sapindus trifoliate. G. sepium is a fast-growing nitrogen fixer with medicinal properties. C. crista makes a good windbreak and has anti-malarial properties. Sapindus trifoliate, as the name suggests, is rich in saponins, meaning it makes a great soap. Its fruit, which resembles a date, is a valuable crop that fetches a good price on the local market. I have received word from the Green Tree Foundation that these windbreak trees have already been planted on site and are doing well. When the mango crops go in, the Green Tree Foundation will provide nitrogen-fixing support trees to assist in the growth of the mango trees.
Given the swales and the addition of the trees, I suspect that within 3-years time, springs will appear at the bottom of the hill below the site. With the site’s exposure next to the national highway and the growing notoriety of the farmer we worked with, it is hoped that our project will be replicated by others throughout the area. I have been invited back by my friends at the Green Tree Foundation to do more work in the area, and I look forward to the day when funding permits me to go there again and carry out more projects.

The work team and the designer celebrate the project’s completion.
This May, I visited the town of Talupula in the drought-stricken Anantapur District in Andhra Pradesh, India at the invitation of the Green Tree Foundation. Although I had seen photographs and general climate data for the region, I was struck but how dry Andhra Pradesh is. The province generally receives 350 to 700 mm of rainfall a year, and though I would like to report more specific rainfall for the District where the project was carried out, repeated requests to the government meteorological office by the Green Tree Foundation over the years have gone ignored.
When I first arrived, I met an engineer from Talupula who is living and working in Hyderabad. I went over what I was planning to do in terms of earthworks, which included swales and possibly a dam. When I mentioned that swales can be built with the aid of a bulldozer with a tilting blade or a grater with a tilting blade, he said that the soils were very hard and would require an excavator.
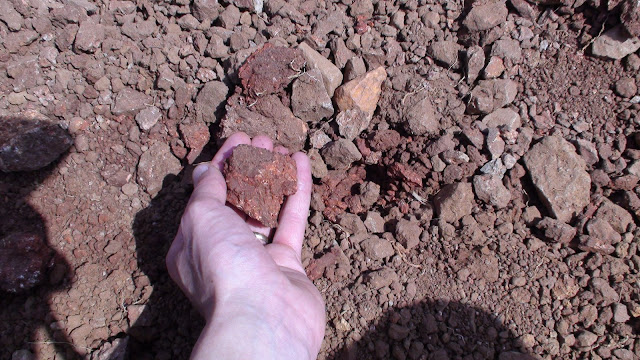 Upon arriving in Talupula, I found the lateritic soils to be slightly more yielding than asphalt. The soils are ferralsols, which are an iron-rich lateritic soil that becomes hard after the land is stripped then subjected to repeated wetting and drying – just the conditions that occur in the dry tropics. When wet, they are very workable and may even bog down machinery working on it. When dry, they are are hard as pavement. In these soils, calcium, magnesium, potassium and sodium are weathered out, and there is next to no humus content in the soil. As a result, the cation exchange capacity is low, meaning that plant health suffers. While these soils do tend to lose potassium easily (another argument against the common practice there of burning pasture land as a management strategy), they do hold onto phosphorus well. They also respond well to amendments of lime and gypsum, though this was beyond the scope of our project.
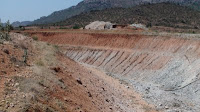 The Indian government is in the process of building a large irrigation channel to divert the flow of the nearest major river to the drier regions of the south. While I am personally skeptical of the ecological viability of this project, visiting the excavation site for the channel did give me the opportunity to examine the typical soil strata of the area. Lateritic soils are deep – sometimes running down to 20 metres in depth. I could see from the channel excavation that the gravelly soil continued down at least 8 metres to the bottom of the channel. All that gravel meant that I would not be designing and constructing an earthen dam as the gravelly conditions require considerable engineering for dam construction. The focus then became on swales and possibly gabions.
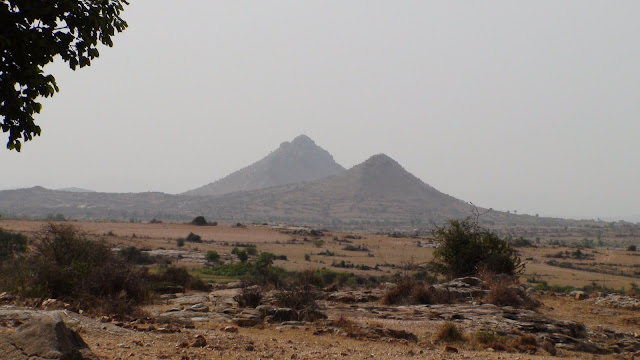 Before I left Canada, a site in Talupula on public land on a small mountain outside of town was suggested. It is said that the deity Obula Swami lives at the summit of that hill. Our potential site there was the highest practical site to work on. On firsthand inspection, however, I found that the access to the site was difficult and there was very limited space to work in. There also were a number of rock walls already build on the site to combat erosion. And as it was public land, would it be subject to neglect, or destruction? A further problem was that shepherds regularly burn the land there, so establishing trees would be difficult at best.
We looked at a second site at the foot of the same mountain on private land. There was a good catchment and plenty of room to work on. After contacting the farmer, though, the restrictions he set made working there not worthwhile.
 For a few days, we were stuck without a site to work on. Then we got the approval of an organic farmer outside of town to do whatever we liked on a 7-acre hillside patch of his land. The farmer, Gangahadr, had already greatly benefited from the agroforestry advice of the Green Tree Foundation and was eager to see what we could do. The land was not too steep, and the nick point on the land (the point at which the hillside goes from convex to concave) was high enough that we could get up near the top of the hill and put in a series of swales. Being private, the land would be well cared for and access to it controlled. Gangahadr had a growing reputation in the area for excellent results, and the site was visible from the national highway, giving the project more exposure. As an added bonus, the site was adjacent to and would thus compliment a rock check dam built in 2005 by the Rural Development Trust. The effect of that dam has been to change the land downstream from desert-like conditions to a rich oasis. This was the site. I met with the Ganghadr and got his permission to build swales on his land.
In Part III, we will look at site planning, implementation, and the results so far.
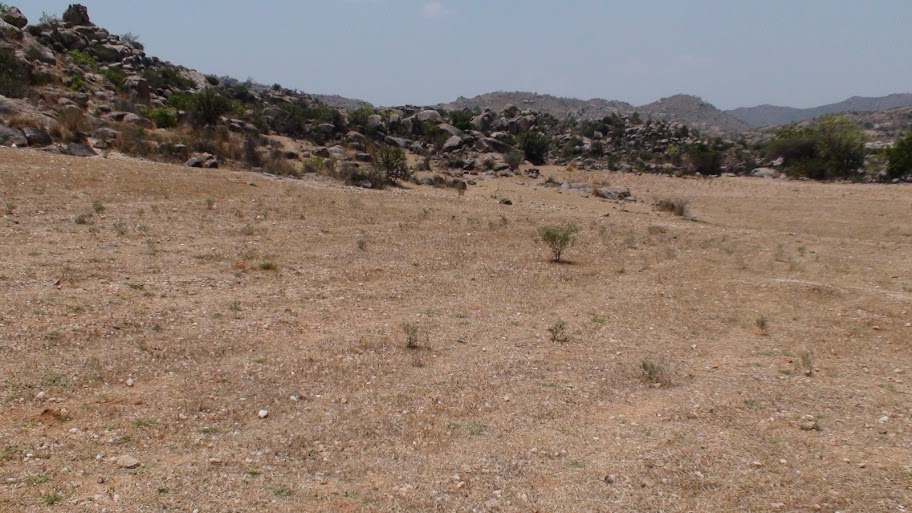 During the month of May, I was in the semi-arid region of Andhra Pradesh, India at the invitation of the Green Tree Foundation. The spread of desertification is something that I have written about here in the past, but to see the environmental degradation of a region that had formerly been a dry-tropical region of forest and savannah is always a real jolt. If nothing is done to halt the biotic pressures of deforestation and uncontrolled grazing and to repair the damage that has been done, this region will become a desert in the not too distant future.
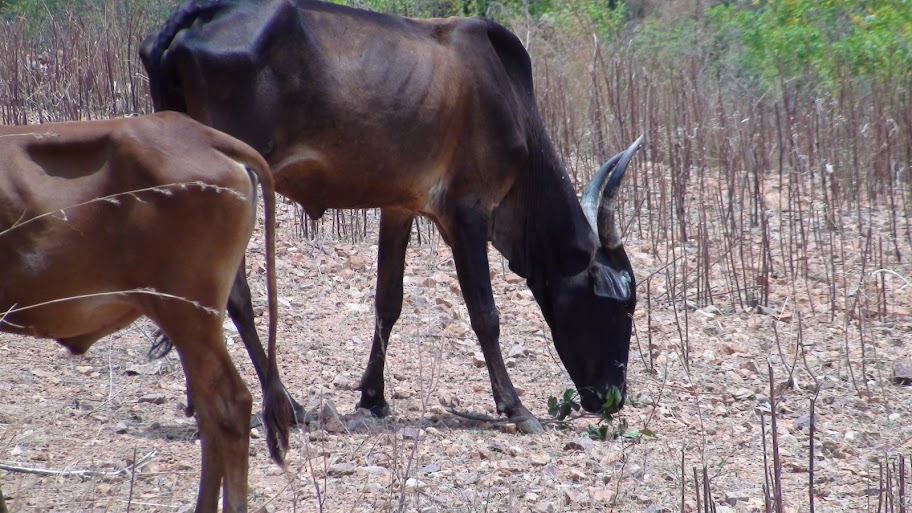 Some forest is lost by people cutting trees for fuel wood but, as many species in the tropics coppice vigorously and firewood cutting tends to coppice the trees cut, this is not the major cause of deforestation there. The major causes of deforestation are land clearing for agriculture and land destroyed by grazing animals or by shepherds setting fire to the land as a management strategy. Also, grazing is communal by default. If land can be accessed by shepherds, both private and public land will be grazed.
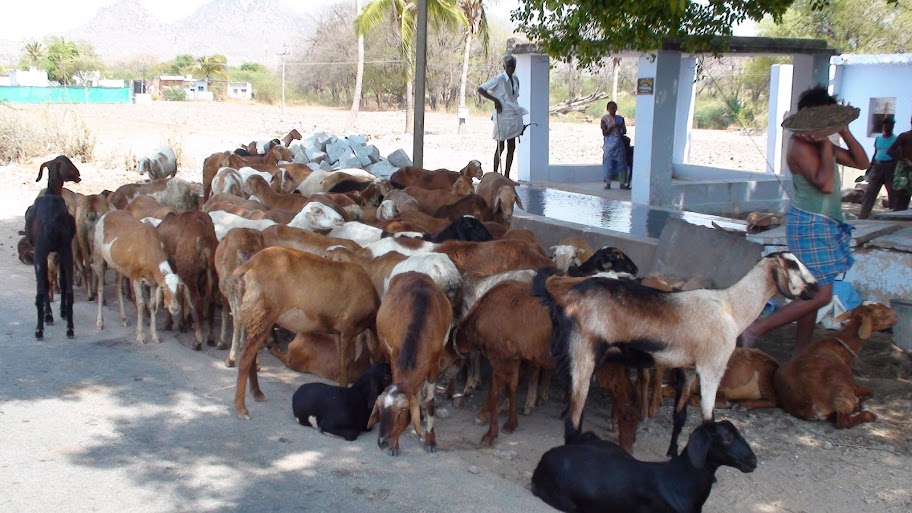 The quickest means of repairing the land might arguably be by the controlled grazing techniques of Holistic Management®. This method would involve using one of the current degraders of the environment – grazing animals – to regenerate the land. I gave the practicalities of this approach some thought. To do just one District of the province would involve a large scale educational program to teach Holistic Management® to thousands and thousands of shepherds. It would also require each shepherd to have portable electric fencing to contain their herds in a controlled area for a controlled amount of time. Additionally, a sophisticated database, easily accessible by cell phone (the only communication tool at a shepherd’s disposal) would be needed to track grazed land and grazing schedules of different plots of land. The alternative, if Holistic Management® were to be employed, would be to have land owners fence their land into small plots and control animal access themselves. One problem here would be to convince the land owner that there would be benefit to him were he to shoulder the expense of fencing and managing the grazing on the land. The alternative is to only allow grazing on one’s own land. The problem here being that this approach would ruin the livelihoods of thousands of families, throwing them into poverty.
Were a land owner looking to raise animals on his or her own land, Holistic Management® would be the ideal approach to take. But as a large-scale solution to the problems of the region, it strikes me as being not very practical given the current system of de facto communal grazing. It would require massive coordinated effort, billions of rupees in training and billions in material costs to make it a reality. And then, it relies on everyone following the rules. While not impossible, it would be extremely difficult to carry out this approach successfully, I think.
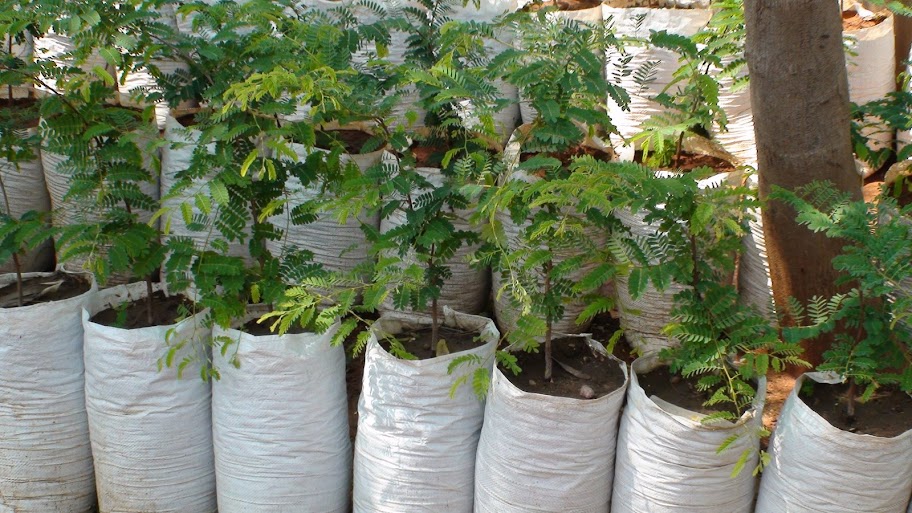 The approach that my associates at the Green Tree Foundation are taking is a tree-based approach. The problems are well defined: poverty from a degraded environment; the environment degraded by biotic pressures – mostly from grazing animals. The solution they are using is to try to replace the forests that once stood and to shift agriculture in the region to an agroforestry-based system.
 They are surveying local villages, finding the material needs of the villagers, selecting appropriate tree species based on local conditions and local needs, and supplying trees at low or no cost to the farmers and citizens of the village. To address the problem of grazing animals specifically, they often seek out productive tree species that are non-browsable or use non-browsable species as a living fence to exclude grazing animals from a site. They are planting agave as a firebreak to protect their planted areas from the fires set by shepherds. They are also encouraging the use of fodder trees for animal feed. Penned animals cause no damage to surrounding lands and feed can be cut and carried from fodder trees to the animals.
The main goal of my visit was to establish water harvesting earthworks and to demonstrate to the Green Tree Foundation staff the proper design and implementation of those earthworks. In Part II, we’ll look at site selection for our water-harvesting project there.
Rainfall in arid regions occurs in large and infrequent events throughout the year. Because the desert environment is a brittle one and because there is so much rain at one time, tremendous erosion occurs. This leads to the creation of scarps and wadis.
Wadi is simply the Arabic word for a riverbed. In an arid region, its water flow is likely to be ephemeral, particularly in headwaters (where permaculturists are most likely to be working). They are also places where a lot of erosion takes place. Looked at from another perspective, wadis are places where a lot of erosion can be stopped.
After teaching a permaculture course in Jordan, designer Geoff Lawton returned to the area a year later and found that someone had built a gabion (an uncemented rock wall, usually held inside a steel cage) across a particular wadi. Although the 8-foot-high gabion was less than a year old, it was already full of settlement and still had water trickling out of the base, despite the fact that there had not been any recent rains.

This natural tendency for gabions in wadis to quickly fill with water-retaining sediment provides us the opportunity to create what I am dubbing the Instant Wadi-Well (for lack of a better name). After determining where the gabion is to be placed, start with a shallow hole about 2 feet (60 cm) deep in a teardrop shape with the tapered end downstream. Place the first row of stones for the well inside the hole and cement them together, leaving the ground unmortared to allow water to seep in. Keep adding and cementing stones until you reach ground level. Once at ground level, continue up but add an extra 2 layers of mortared stone at the tapering end to allow stability in the face of the rushing torrent and sediment that is to come with the first rainfall. Continue this right up the entire height of the well shaft, making the top row at least 3 feet (90 cm) above the height the gabion will be. After all the sediment moves in, it is likely the well casing will only be 2 feet (60 cm) above the sediment.

All that is left is to build the gabion. Wire cages are not absolutely necessary for the gabion to perform, but they are recommended as they make it far less likely that the rock wall will blow out in the face of the torrent of water, sand and silt.
If the well casing is built strong enough, then there will likely be a well within a few major rain event is. The water will have to be tested as deserts tend to have salty soil. Baring salinity problems, this would be a quick and easy way to establish clean wells and combat erosion at the same time!
This technique compliments other systems as well. For example, if there are storage tanks or cisterns at the top of the scarp, a windmill can be employed to pump water from the Instant Wadi Well to this higher storage. From there, it can be gravity fed down to where it is needed.