• Home
  • Courses
  • Articles
  • Member

Permaculture Reflections

Learn sustainable design

Articles and courses by Douglas Barnes

In Memory of Bill Mollison

Douglas Barnes’s Articles at Permaculture Reflections

September 25, 2016 by Douglas Barnes 3 Comments

Bill Mollison

Bill Mollison


“Speak, you bastard!”

Those were the first words Bill Mollison said to me. It was in a lecture hall in the Chemistry Building of the University of Melbourne on the first day of a permaculture design certificate course in 2005. It was the start of two glorious and gruelling weeks that would change me forever.

Born in the small town of Stanley, Tasmania on May 4, 1928, Bill became a real renaissance man of his day. Bill had been fisherman, lumberjack, scientist, academic, activist, and more in his time.

It was during his time as a scientist in November, 1959 that a spark ignited in Mollison’s brain while he was watching browsing marsupials in Tasmania. He wrote in his journal “I believe that we could build systems that would function as well as this one.” With this simple statement, Mollison, in his own words, “had broken the barrier between passive observation… and the active creation of many similar systems that we could construct ourselves.”

It was during this period of research that Bill came to see that the resiliency of a system was established, not by the number of species in it, but in the functional connections between the species in that system. In Mollison’s words,

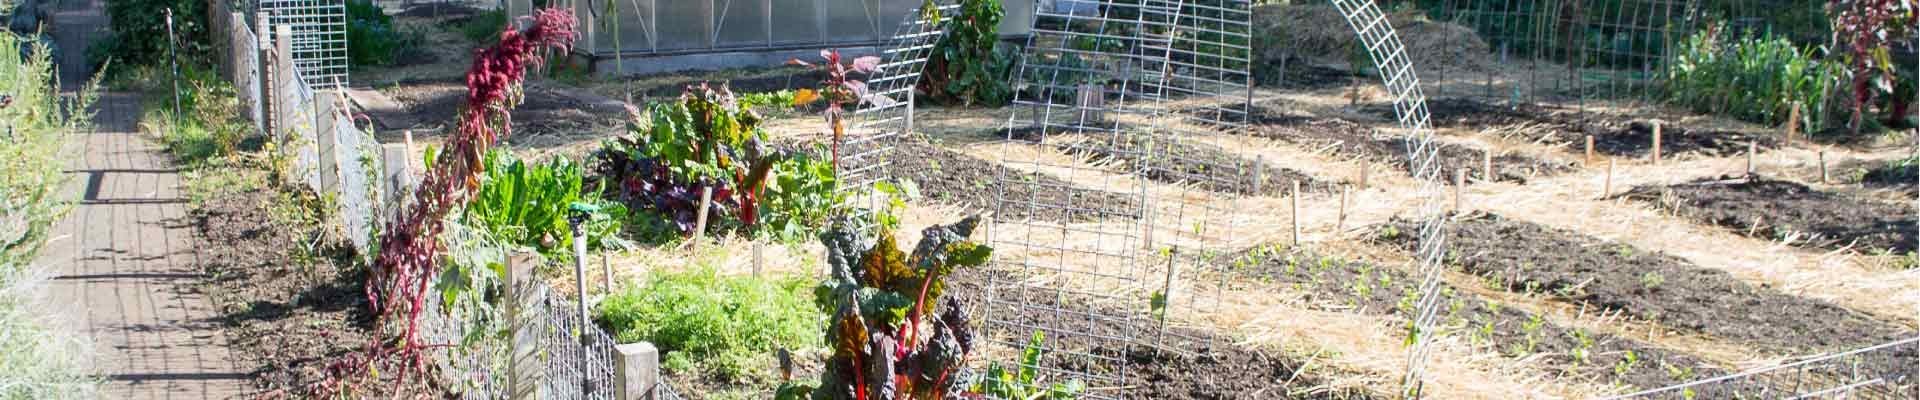
This then was both the precursor and the core of Permaculture; the realisation that we can create systems, based on analogies of natural systems, or try to improve them for productivity, and then allow the created system to demonstrate evolutions, stepping in at critical stages to manage, to add or subtract species, and observing at all times. These system analogies, if well constructed and recorded, could produce a yield that could be constantly accessed or improved, and would also need minimal maintenance energy, after the establishment phase.

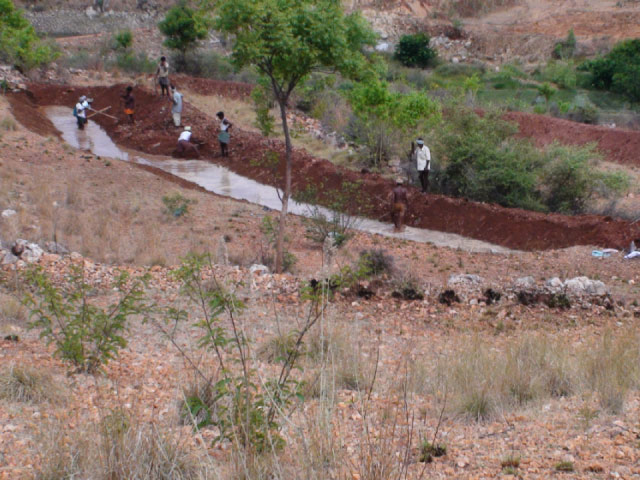
It was more than a decade after Bill’s initial observation that he started to build these systems, which were then introduced to the world in 1978, when he published Permaculture One with his student David Holmgren. From there, Bill took permaculture around the world, teaching thousands, and installing systems in Africa, Australia, Asia, Europe, and North and South America, building a worldwide permaculture movement.

For his work, Bill received many awards, including the Right Livelihood Award (AKA Alternative Nobel Peace Prize) in 1981, and being named an Australian Icon of the Millennium.

Bill was a man of a different age. Although separated by continents, and born more than a decade apart, he reminded me very much of my own father, who was born in 1914 and was killed 8 years before my course with Bill. Physically, Bill looked a lot like my father, and his preference for speaking in subtle sarcasm was also very much like my father. It was impossible for me not to grow a fond attachment for Bill, and to almost mistake him for my father.

People who didn’t know Bill thought love was his inspiration for his tireless work in sustainable design and education. It wasn’t. It was fierce anger at the thoughtless destruction of the natural world, and the harmful practices of conventional agriculture and architecture that were damaging land and wasting energy. And with this anger, he would ruthlessly shred his opponents.

Mixed with this anger was also a devilish sense of humour. When Bill wasn’t probing to find what your buttons were so he could push them, he was busy making a joke — and preferably a dirty one. Being with Bill was never boring.

Bill passed away on September 24th, 2016 at the age of 88. He was dearly loved, and will be sorely missed by his many thousands of students around the world.

Goodbye, Bill, and thank you.

Filed Under: Article Tagged With: Obituary

Case Study: Ridgepoint Dam

Douglas Barnes’s Articles at Permaculture Reflections

November 26, 2015 by Douglas Barnes Leave a Comment

The following interactive infographic gives highlights of the recent ridgepoint dam construction at Circle Organic Community Farm.

Filed Under: Article Tagged With: earthworks

The Importance of Wildlife

Douglas Barnes’s Articles at Permaculture Reflections

November 6, 2015 by Douglas Barnes Leave a Comment

“What do you do with bulrushes, or do you do anything?” Jim asked. “It seems like they get into every pond I dig.”

Jim was the excavator operator on a dam I was installing on Circle Organic Farm in Millbrook, Ontario. I told him that as long as it attracts wildlife to the site, it’s welcome. I told Jim that it will really help the farm to have wildlife come in and cycle nutrients through the site. “Anything is welcome, as long as it craps before it leaves.” This led to a discussion about the loss of our regions phosphorus transport system with the loss of the passenger pigeon.

Image of passenger pigeon

Image from Wikipedia.

The Northeast’s phosphorus supplier

Once upon a time, there were between 3 and 5 billion passenger pigeons. Each pigeon produced around 11.5 kg (about 25.4 lbs) of guano per year. Add that up and you get a lot of poo. The passenger pigeon would deposit between 2.8 and 6.9 billion kg (6.2 to 15.2 billion lbs) of phosphoric acid each year, and between 3.8 and 9.2 billion kg (8.4 to 20.3 billion lbs) of nitrogen each year.

To give you an idea of how important this was to the ecosystem, over the whole of the U.S., farmers apply 7.9 billion kg of nitrogen to farmland each year. The passenger pigeon did it just in the northeastern region of North America.

Former Passenger Pigeon Range

Passenger pigeons were far from the only player in the fertility game. Click through the animals on the infographic below to see their phosphorus contributions. Whales, for instance, once cycled 340 million kg (750 million lbs) of phosphorus from the ocean depths to the surface. Whales often dive deep to get their food, then defecate near the surface. The effect is to cycle nutrients from the deep ocean to the surface, making them more available for life there. Nutrients near the surface, in turn, can then spread to terrestrial systems. As these systems have gone into decline, nutrient availability has suffered. This matters because this is a problem we all have to solve (in so far as we are interested in surviving, at least). [See http://www.pnas.org/content/113/4/868.abstract]

Click the animals to see their former and current phosphorus contribution:

For the permaculturist

If you are a permaculturist or other designer of sustainable systems, this means you will have to have respect for zone 5. [For a review of the permaculture zone, jump over to the Design Fundamentals I course. It’s free.] Zone 5, for those who don’t know, is the portion of a site that is left wild. It is used as a place to forage some foods, as a reservoir for wildlife, and as a model of a natural system to study and learn from.

As a reservoir for wildlife, one of the roles it carries out is to enhance the cycling of nutrients on the site. A lot of people would view zone 5 as wasted space that could be generating an income. However, any shortfall between the amount of nutrients cycled by wildlife or captured by plants on the site will have to be imported. In other words, you will have to pay to import any shortfall in fertility on the site.

It is also worth mentioning the significant role that preserved wild areas contribute to pest control. If you have a site that is just a field of all crop, you have a pest smörgåsbord. Wild areas serve as reservoirs for all species, pest and predator alike, which help to reduce crop pests. [See Gurr, Wratten, et al. (2004) Ecological Engineering for Pest Management: Advances in Habitat Manipulation for Arthropods, pp. 165-180. CSIRO Publishing, Collingwood, AUS.]

The takeaway

The message here is that as nature goes about it’s business, it is helping to keep you and your business alive. Make space for it. Make a lot of space for it. Zone 5 areas are a part of the productive, energy-catchment systems that you need to make your site sustainable.

Filed Under: Article Tagged With: Design

Uncovering Assumptions

Douglas Barnes’s Articles at Permaculture Reflections

October 21, 2015 by Douglas Barnes 4 Comments

There’s more to design than techniques

Design is fascinating. On the surface, it’s simple and has straight forward principles that you can comprehend at first glance. And yet the more you look at those principles year after year, the deeper your understanding becomes.

Good design is not only easy to recognize, it also looks obvious when you see it. And yet, it’s so easy to design poorly. If you are a design teacher like I am, then this creates an additional design challenge. How can you impart upon your students the methods of something that seems so esoteric?

One common approach is to teach a bunch of techniques. This assumes that design is just a technical question; as if all that is necessary is to have a solution to every problem you can identify.

Don’t get me wrong. Techniques are really important, and I teach them. But if you stop there, you’ll miss the forest for the trees. You can have all the techniques down but still miss the mark when it comes to design.

How can we get a handle on the non-technical side of design? I’d like to share one approach I’ve found really helpful in the design process that I think will help you design better.

Hidden assumptions

The approach I’m focusing on in this article is working to uncover assumptions about a problem. The example of teaching design as merely a set of techniques is an example of this. The idea that good design comes from presenting good permaculture techniques to students is an assumption (and an incorrect assumption at that).

If we quantify the world, it becomes a sea of data. We can’t hope to keep track of all that data. There is just too much information out there. To cope with this, we have a cognitive map of the world that we’ve built mostly unconsciously. This map tells us about the world around us, and how that world works. This map is wrong. The world is too complex for this mental representation to be anything other than wrong. It’s our best guess on how the world works.

What does this mean and what does it matter? On a personal scale, it means that we have ingrained assumptions about the world and how it operates that are probably either incorrect, or not fully correct. On the project level, it means that we have assumptions about how a site behaves and about our plan for the site.

Cattle farmer, or protein producer?


Farmland used to grow corn and soy for cattle.

Let me give you an example. I have a neighbour with a cattle farm. He grows corn and soy to feed his cattle. His fields are at the bottom of a clayey hill, and are prone to excessive moisture — excessive when it comes to the production of corn and soy, that is.

To address this, he hired a team of consultants and earth movers to install tile drainage in the fields to deal with the water. In accordance with Murphy’s Law, the following year saw a record drought. The problem could be broken down as a set of assumptions about the farm. Those assumptions are:

  • I am a cattle farmer.
  • I need corn and soy to feed my cattle.
  • The land needs drainage to grow the corn and soy better.

Removing the assumptions about the land, we get

  • This land is wet.

If we remove the specifics of cattle farming, we get

  • I am a protein producer.

Your gears are probably spinning at this point.

I am a protein farmer + wet land = aquaculture.

Trout and other farmed fish sells at or above the price of beef (beef being priced highly at the time this is written because of the previously mentioned record drought) and has a feed conversion rate that is at least 5 times lower than beef in this climate. (Feed conversion rate is the amount of feed required to produce one unit of body mass of the animal being fed.)

The farmer was right to hire consultants and spend tens of thousands of dollars regarding the water on his site. It’s just that he hired the wrong team working in the wrong direction.

The team he hired did their job well, but it was a job that shouldn’t have been done. The land is wet. It “wants” to be wet. Leave it alone, and it will be wet. With a little bit of help, it can be made even wetter. To make it dry will require a lot of work, throw away a valuable resource (water), and create a missed opportunity.

Imagine the same farm, now with water harvesting earthworks on the hillside to saturate the soil with even more water. Imagine the excavators brought in, not to dig trenches for drainage, but to excavate an array of long, narrow ponds. The earth excavated for the ponds is placed between the ponds, building the earth up. The topsoil from both the area over the ponds and the area between the ponds is finally placed on top of the mounds between the ponds, making vegetable beds with deeps soils. There is even room in here for adding trees. This would have the added advantage of shading the ponds to keep the water temperature down, which would help maintain the oxygen levels the trout would need (not that trout would be the only option).

Alternative polyculture aquaculture regime for farmland.

In this scenario, the farm still produces protein, but it does it more efficiently by shifting to aquatic production. The farm also diversifies by adding vegetable production from the beds between the ponds.

Moral of the story

The message here is not about the farmer and his vision. It’s that we carry with us underlying assumptions about how things are and how things should be; and that those assumptions are, at best, incorrect approximations of how things are or could be. When we can spot those assumptions and challenge them, we free ourselves to do something creative that can be really effective.

As a designer, you need to find the pieces of the picture you are taking for granted. Ask yourself why something is the way it is. Ask yourself what-if questions. Set aside time to look at what you are taking for granted, and see what might happen if you operated outside of those assumptions.

Filed Under: Article Tagged With: Design

Permaculture Earthworks Courses

Douglas Barnes’s Articles at Permaculture Reflections

September 26, 2015 by Douglas Barnes 2 Comments

Bulldozer making water harvesting earthworks.

Dates:  Sunday, November 15, 2015 ~ 9:30AM to 4:30PM
              Or
             Monday, December 7,  2015 ~ 9:30AM to 4:30PM

Location:  Circle Organic Farm Community Farm, 338 County Road 10, Millbrook, Ontario

Workshop Fee:  $100 (includes lunch and digital materials on workshop content)

Content:  The workshop will cover theoretical material explaining the design process, water harvesting approaches applicable in Ontario, as well as common problems and cautions for earthworks in Ontario. There will be a design exercise for students, and a tour of the Circle Organics site and its earthworks project.

The Circle Organic site is installing an integral swale and dam system to assist in irrigation of their vegetable crops. This is the first stage in a broad vision for the site.

Instructor:  Douglas Barnes

To Register Call:  705•932•9888
Email:       farm@circleorganic.ca

Filed Under: Article, Courses

Swale Calculator

Douglas Barnes’s Articles at Permaculture Reflections

September 2, 2015 by Douglas Barnes 27 Comments


Update: The Mark III Swale Calculator is here!

Swale Calculator

   Input numbers only.

Desired number of swales:


Distance from bottom to top of hill (m):

Volume of rainfall in a large event (mm):

Length of swale (m):

NOTE: No slopes over 20º for safety and efficacy.

Estimated slope above swale in degrees:

Select estimated percent of runoff:


   (See table below for runoff guide.)


   Results


Video tutorial:


Surface Percentage of runoff
   Paving, roofs, hard surfaces 85 to 95%
Hardpan 50 to 70%
Bare earth 20 to 75%
Grass 10 to 25%


Welcome to the Mark III online permaculture swale spacing calculator. Swale spacing has been a perennial question in permaculture. This calculator creates a template for swale placement based on a logarithmic distribution. It is based on the fact that groundwater flows downward, leaving the top half of hills drier than the bottom. The idea is that water collection should be more intensive at the top of a hill, and be progressively less as you move down the hill.

Why calculate spacing?

Installing swales costs time, energy, and money. Over-installation of swales is a waste of resources. Under-installation is a missed opportunity. If you want to have an optimal system, you’ll need to calculate spacing. The good news is that now it’s easy with our calculator!

How to use this calculator

  1. You will need to measure the hill from the bottom to the top (or from the bottom accessible boundary to the top accessible boundary, if you hit either physical boundaries or property boundaries). This figure will need to be in metres for the calculator. You can convert units using Google. If you are using an aerial map and are only using the horizontal distance from the bird’s-eye perspective, you will need to convert this to the on-the-ground distance (i.e. the hypotenuse) using trigonometry. (Distance on ground = x ÷ cos Θ where x is the horizontal distance, and Θ is the slope of the hill in degrees.)
  2. Check the local weather records to see how much rain you can expect in a single large rainfall.
  3. Input the length of the swale you will build.
  4. Estimate the slope of the land above the swale in degrees. A mobile app such as Theodolite HD can help here.
  5. Estimate the percentage of runoff on the site. Use the table above to help you. [Note: If it’s 0%, you can only dig circular swales.]
  6. Keep in mind that because contour lines are not parallel, the swale spacing will not be uniform across the entire length of the swales. This calculator gives you the best approximation. I do have the the Mark IV in the concept stage, which will address this issue.
  7. The calculator will return each swale’s location form the bottom of the hill, the volume of each swale, and the cross-sectional area of the swale, which you can use to plan the size of the swale.
  8. Cross-sectional area in m2
  9. Because of the assumptions built into this calculator, you will need to determine if the volume and cross-sectional area of the top swale is correct or not. You will need to know the catchment area above your swale, and make sure it is big enough to hold all the runoff it will receive.

How spacing works

This calculator assumes you want to capture the maximum amount of water available on a site. There are plenty of times where you will not want to do this. Make sure you know whether swales are going to be helpful or harmful. See An Introduction to Swales and When Swales Can Kill for more information.

Remember that the figures given by the calculator are a guide. There will be an inherent margin of error. Spacing is based off the assumptions that your contour lines are going to be roughly parallel (they won’t be in the real world), and that your catchment area is going to be rectangular in shape (or at least an area with parallel edges). In practice, you might face an irregularly shaped catchment area. The calculator can still serve as a rough guide for you in these instances.

Designing your swale layout

With implementation of earthworks, it is ideal to start at the top and work your way downhill. When designing your plan with this calculator, the figures given (Swale 1, Swale 2, Swale 3, etc.) are from the bottom of the hill to the top. In other words, the first distance for Swale 1 is measured from the bottom of your hill.

Catchment areaSpacingFirst swaleSecond swaleThird swaleFourth swale


Spacing is determined by a logarithmic distribution from bottom to top. This will result in larger, wider spaced swales at the bottom, and closer, smaller swales at the top.

This arrangement makes the most sense in terms of encouraging water infiltration. The water table will drain downward, leaving the top drier. A greater number of swales at the top will allow more water to infiltrate there.

Limitations of the calculator

The question of swale spacing has been an ongoing puzzle in permaculture. A few years ago, it seemed like we had an answer. In Brad Lancaster’s excellent book Rainwater Harvesting for Drylands and Beyond, there is a formula for spacing which in turn cites The Handbook of Hydrology, edited by David Maidment. Unfortunately, the spacing formula isn’t designed to maximize water collection. It gives unit swale volume divided by unit runoff. The problem here is the formula does not take into account the catchment size for the swale. It could have you putting undersized swales at intervals that are not based on the amount of water they will receive. (Testing with the first iteration of this calculator showed this flaw early on.)

The first publicly available online calculator (the Mark II) based spacing on the volume of the swales you built. The problem here is that it did not tell users how to distribute swales across the landscape. This new version provides you will spacing, volume, and cross-sectional area with the minimal amount of input data. That is to say, it does a better job of telling you what to do.

This calculator could be a lot more complicated than it is. It is meant to serve as a good guide to swale design so that you can effectively catch the available runoff without overkill (i.e. without spending more time, money, and effort than you need to spend). It simplifies infiltration rates as a function of runoff. Also, it does not account for hydraulic conductivity (saturated or otherwise),  depth to a restrictive layer, and so on. At the end of the day, we are digging a ditch on contour, not launching a spacecraft. Hyper-precision will be a waste of time. It also errs on the side of caution. The volume of your swales at the end does not account for infiltration. This will build some resiliency into your swales. They are better being a little too big than too small.

Behind the scenes

If you want to know what’s going on inside the calculator (and hopefully spot any glaring errors, if there are any), here’s how it works.

  • Spacing is determined using log(n+2), where n is the number of swales you select. For a case with 5 swales on a site (i.e. n = 5), we get the distribution shown in the diagram below.
  • Swale spacing diagram showing logarithmic distribution.

  • The runoff above every swale but the top one will be given by the formula: Runoff Volume (litres) = C • ACatchment (m2) • Vrain (mm), where C = Coefficient of Runoff (which is percent runoff ÷ 100), ACatchment is the area of the catchment in m2, Vrain is the volume of a large rain event in mm, and the ACatchment is the Swale Length in metres • Distance to uphill swale in metres.
  • Vswale = Runoff Volume
  • And Area of swale = Vswale ÷ (Length of swale • 1000). The division by 1000 here is to get us back in the correct units.

This is version 2.0 of this calculator. (But Mark III sounds cooler.)

Swales in AP, India.


We’ve got many courses currently in the works and updates to the site, including this page, coming. If you would like to be notified of our updates and courses, subscribe to our mailing list.


Filed Under: Article Tagged With: earthworks, Water

Image of urban vegetable plots

A Brief Introduction to Permaculture

Douglas Barnes’s Articles at Permaculture Reflections

July 20, 2015 by Douglas Barnes 10 Comments

Firefox users please note: You will get a pop-up warning. The course has been tested on Firefox and will run if you are running an up-to-date version of Firefox on Windows Vista (or newer), Firefox OS (for mobile), Linux, or OS X (10.7, or newer). If you have difficulty, please use another browser.

Chromium users please note: Chromium does not support the mp3 audio. Please use Chrome or another browser.


Suggested courses:

Design Fundamentals I (Free)

Design fundamentals II (Free)

A course from our Introduction series.

Filed Under: Article Tagged With: Getting started

An Introduction to Swales

Douglas Barnes’s Articles at Permaculture Reflections

July 20, 2015 by Douglas Barnes 3 Comments

begin=”0s” repeatCount=”indefinite” fill=”remove”/>

What are swales?

Water-harvesting swale

Simply put, swales are ditches dug on contour. Being level, they are not designed to transport water from one place to another. Rather, their intention is to allow water to soak into the ground.

The term “swale” is a little confusing, as it is used in landscape architecture to describe a grassy ditch designed to gently drain water from an area. In permaculture, however, the term means a level water-harvesting ditch.

Why are swales used?

Swales stop runoff, allowing water to sink into the ground. The effect generally raises the water table. This makes them useful in supporting trees, and as part of a broader water-catchment strategy for a site. It should be noted, though, that many fruit trees do poorly in areas with a high water table. You will have to consider where you are installing swales, and to what end.

Where are swales used?

Swales can be used on sites with slopes from 0º up to 20º. Even seemingly flat sites can have circular swales used to capture water. On slopes greater than 20º, it is not only unsafe for most machinery used to dig swales, the volume of earth moved versus the volume of the swale makes swale construction inefficient. A smaller volume swale has a smaller catchment area, requiring more frequent spacing of swales. (See the graphic below and the Swale Calculator for more.)

Click “Animate” on the graphic below to see the effect of slope on volume.

Animate

Note that as the slope increases, the volume of the swale decreases.

Where not to use swales

Firstly, swales are aimed at supporting trees and raising the water table. If you want irrigation for a vegetable garden, swales are not the way to do this. In many, if not most cases, the water captured by swales would penetrate too low to benefit garden crops. Additionally, most garden crops will not tolerate the water table within 30 cm (1 foot) of the surface for more than 24 hours. This is why farmers are willing to spend tens of thousands of dollars on carefully engineered drainage systems. Too much water is as bad as too little.

Secondly, there are situations in which swales can cause damage to property or even loss of life! As always, you will have to design with safety in mind. For more on this topic, see the article “When Swales Can Kill.”

Filed Under: Article Tagged With: earthworks, Water

Protecting Trees from Acid Rain

Douglas Barnes’s Articles at Permaculture Reflections

July 17, 2015 by Douglas Barnes Leave a Comment

The ongoing problem of acid rain causes injury, slow growth, or sometimes death of trees. Some soils are able to buffer the acidity effectively. Other soils, however, lack an effective buffering capacity, putting trees at risk.

How acid rain damages trees

While acid rain can directly damage leaves, it also shifts soil pH, making soil nutrients unavailable to plants. Acid rain can also release the aluminum in soil. Trees are then able to take up the aluminum, which is toxic to them.

Trees in alpine regions are more at risk, even if they have buffering soil. The clouds that bathe the mountain tops are acidic, subjecting the trees to more acidity than trees at lower elevations.

A ray of hope, please.

As has been shown in research done by Cornell University, mycorrhizal fungi can help to protect some trees from the effects of acid rain.

Through the hyphal network of mycorrhizal fungi, the trees has access to a greater amount of calcium — a nutrient made less available by acid rain. Unfortunately, not every tree will form associations with mycorrhizae, leaving those trees most vulnerable.

Additionally, mycorrhizae will not prevent acid rain from leaching toxic aluminum out of the soil.

What can I do to help?

Calcium amendments to your soil will help to make the nutrient more available for trees. Bone meal, powdered eggshells, or powdered oyster shells can help to boost the calcium available to trees.

Filed Under: Article Tagged With: fungi, trees

Farm in Bangladesh.

How to Combat Arsenic in Ground Water

Douglas Barnes’s Articles at Permaculture Reflections

July 17, 2015 by Douglas Barnes Leave a Comment

Arsenic in groundwater is a severe problem in West Bengal and in Bangladesh, where it is estimated to cause 200,000 to 270,000 deaths per year. [Other regions are also affected, including Argentina, Chile, China, India, Mexico, Taiwan, Thailand and the United States of America.]

In humans, arsenic causes arsenicosis which causes skin problems including skin cancer, bladder, kidney and lung cancer, disease to the blood vessels of the legs and feet which can lead to gangrene, and is suspected to contribute to diabetes, high blood pressure, and reproductive disorders. [Source WHO] The WHO’s Guideline Value for arsenic in drinking water is 0.01 mg /litre.

The problem of arsenic in drinking water can be tackled by harvesting rainwater – a strategy routinely advocated in permaculture.

Arsenic also affects agriculture in two ways: arsenic is drawn into plants contaminating the plant; and arsenic is drawn up instead of phosphorus, which is a major limiting factor in plant growth. The result is a plant that has a degree of toxicity and is stunted due to lack of phosphorus. When groundwater irrigation is utilised in areas with arsenic contamination, these problems appear.

The use of swales, or water-harvesting ditches on contour, is the most cost effective type of earthworks for capturing water. It also reduces or eliminates the need for groundwater irrigation.

Mycorhizzae

Image by André-Ph. D. Picard

Additionally, endomycorrhyzal fungi can be employed to help alleviate the arsenic problem. Plants with the endomycorrhyzal fungi Glomus mosseae have been show to reduce plant uptake of arsenic and increase the uptake of phosphorus as research by the University of Aberdeen recently shows:

Arsenic (As) contamination of irrigation water represents a major constraint to Bangladesh agriculture. While arbuscular mycorrhizal (AM) fungi have their most significant effect on P uptake, they have also been shown to alleviate metal toxicity to the host plant…. Plant height, leaf/ pod number, plant biomass, root length, shoot P concentration/offtake, root P offtake and mycorrhizal infection decreased significantly with increasing As concentration. However, mycorrhizal inoculation reduced As concentration in roots and shoots. This study shows that growing lentil with compatible AM inoculum can minimise As toxicity and increase growth and P uptake.

Research done in China using different species of mycorrhizal fungi finds that the fungi can also protect corn from arsenic contamination. Using Glomus species and Acaulospora species, the team found that the fungi reduced plant uptake of arsenic:

A pot experiment was conducted to examine the roles of indigenous and non-indigenous arbuscular mycorrhizal (AM) fungi in As uptake by maize (Zea mays L.) from original As-polluteded [sic] soil, and their effects on As and P fractions in the rhizosphere…. All results indicate that indigenous consortia M2 could protect their host plants from the toxicity of excessive As through P nutrition by activating P, though non-indigenous M1 could alleviate As toxicity through stabilizing As and P in the soil.

It is reasonable to expect that other plants that form mycorrhizal associations would also have reduced arsenic uptakes from Glomus species and likely Acaulospora species as well. In arsenic-contaminated regions, it would be a good idea to inoculate soils with Glomus species and avoid practices that hinder mycorrhizal growth (ploughing, adding synthetic nitrogenous fertilisers, addition of too much phosphorus).

Filed Under: Article Tagged With: fungi, land repair, soil

  • 1
  • 2
  • 3
  • …
  • 8
  • Next Page »

Courses

A Brief Introduction to Permaculture

Design Fundamentals I

Design Fundamentals II

Articles by tag

Getting started

Temperate climate

Tropical climate

Arid climate

Urban permaculture

Design

Earthworks

Energy

Fungi

Home design

Interviews

Land repair

Patterns

Soil

Trees

Water

About TOS Contact Resources
  • Facebook
  • Twitter

Copyright © 2005 - 2025 · EcoEdge Design Ltd.