• Home
  • Courses
  • Articles
  • Member

Permaculture Reflections

Learn sustainable design

Farm in Bangladesh.

How to Combat Arsenic in Ground Water

‘Soil’ Articles at Permaculture Reflections

July 17, 2015 by Douglas Barnes Leave a Comment

Arsenic in groundwater is a severe problem in West Bengal and in Bangladesh, where it is estimated to cause 200,000 to 270,000 deaths per year. [Other regions are also affected, including Argentina, Chile, China, India, Mexico, Taiwan, Thailand and the United States of America.]

In humans, arsenic causes arsenicosis which causes skin problems including skin cancer, bladder, kidney and lung cancer, disease to the blood vessels of the legs and feet which can lead to gangrene, and is suspected to contribute to diabetes, high blood pressure, and reproductive disorders. [Source WHO] The WHO’s Guideline Value for arsenic in drinking water is 0.01 mg /litre.

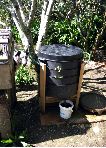
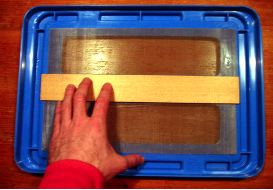
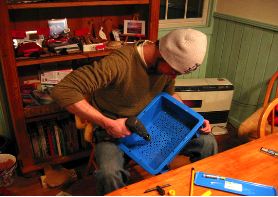
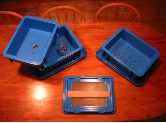
The problem of arsenic in drinking water can be tackled by harvesting rainwater – a strategy routinely advocated in permaculture.

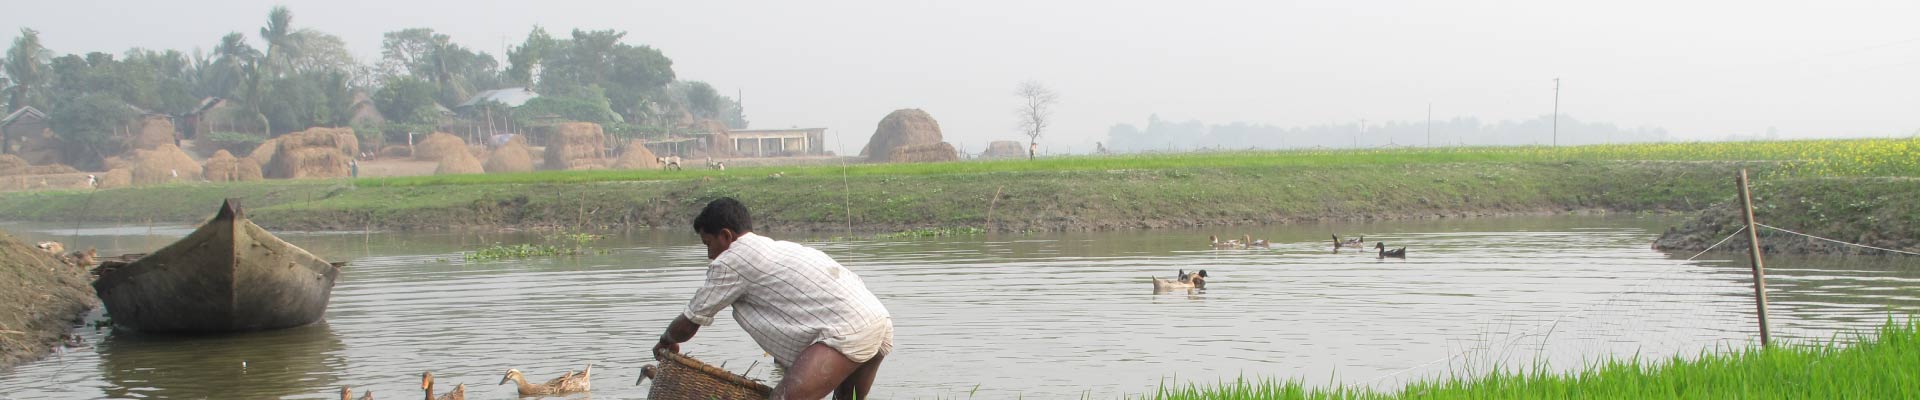
Arsenic also affects agriculture in two ways: arsenic is drawn into plants contaminating the plant; and arsenic is drawn up instead of phosphorus, which is a major limiting factor in plant growth. The result is a plant that has a degree of toxicity and is stunted due to lack of phosphorus. When groundwater irrigation is utilised in areas with arsenic contamination, these problems appear.

The use of swales, or water-harvesting ditches on contour, is the most cost effective type of earthworks for capturing water. It also reduces or eliminates the need for groundwater irrigation.

Mycorhizzae

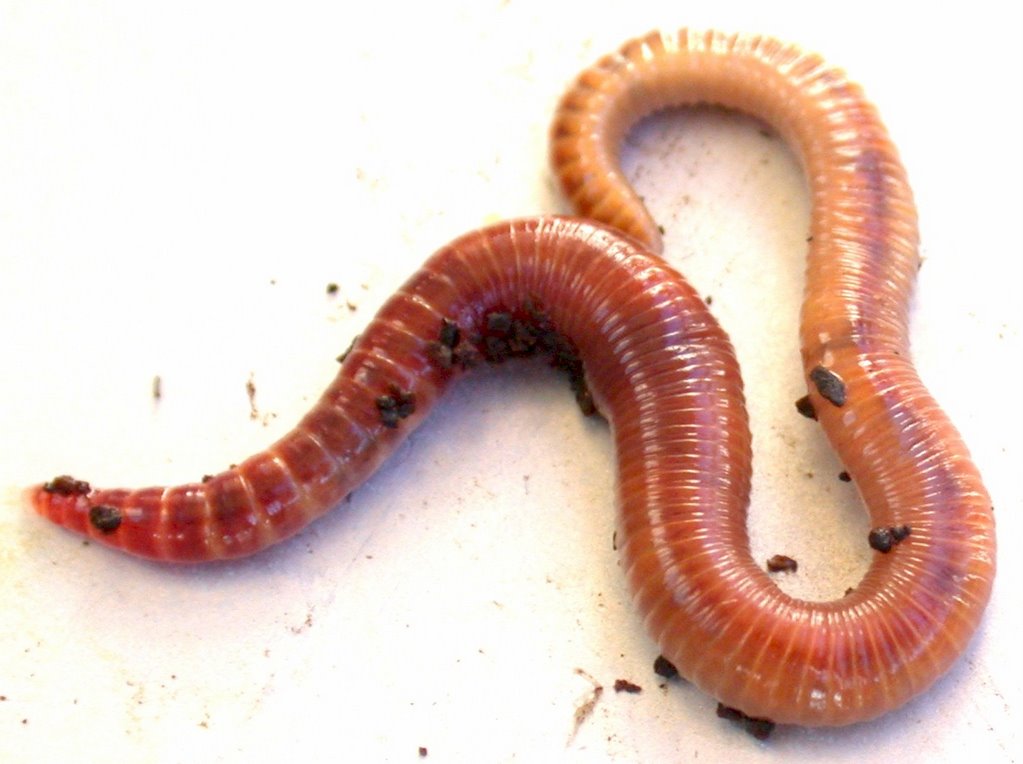
Image by André-Ph. D. Picard

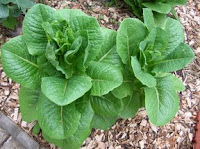
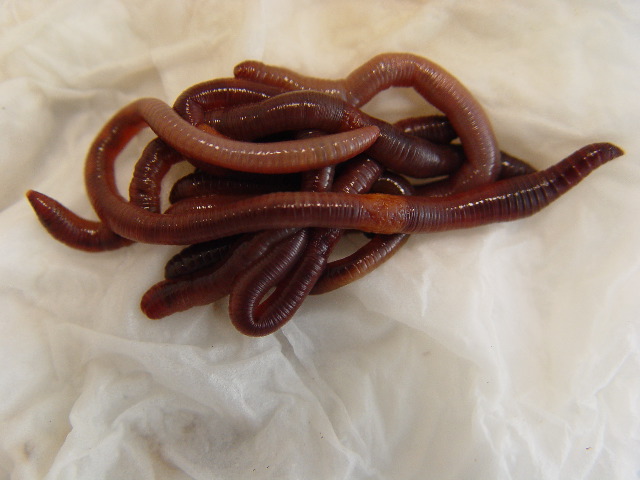
Additionally, endomycorrhyzal fungi can be employed to help alleviate the arsenic problem. Plants with the endomycorrhyzal fungi Glomus mosseae have been show to reduce plant uptake of arsenic and increase the uptake of phosphorus as research by the University of Aberdeen recently shows:

Arsenic (As) contamination of irrigation water represents a major constraint to Bangladesh agriculture. While arbuscular mycorrhizal (AM) fungi have their most significant effect on P uptake, they have also been shown to alleviate metal toxicity to the host plant…. Plant height, leaf/ pod number, plant biomass, root length, shoot P concentration/offtake, root P offtake and mycorrhizal infection decreased significantly with increasing As concentration. However, mycorrhizal inoculation reduced As concentration in roots and shoots. This study shows that growing lentil with compatible AM inoculum can minimise As toxicity and increase growth and P uptake.

Research done in China using different species of mycorrhizal fungi finds that the fungi can also protect corn from arsenic contamination. Using Glomus species and Acaulospora species, the team found that the fungi reduced plant uptake of arsenic:

A pot experiment was conducted to examine the roles of indigenous and non-indigenous arbuscular mycorrhizal (AM) fungi in As uptake by maize (Zea mays L.) from original As-polluteded [sic] soil, and their effects on As and P fractions in the rhizosphere…. All results indicate that indigenous consortia M2 could protect their host plants from the toxicity of excessive As through P nutrition by activating P, though non-indigenous M1 could alleviate As toxicity through stabilizing As and P in the soil.

It is reasonable to expect that other plants that form mycorrhizal associations would also have reduced arsenic uptakes from Glomus species and likely Acaulospora species as well. In arsenic-contaminated regions, it would be a good idea to inoculate soils with Glomus species and avoid practices that hinder mycorrhizal growth (ploughing, adding synthetic nitrogenous fertilisers, addition of too much phosphorus).

Filed Under: Article Tagged With: fungi, land repair, soil

Mushrooms

Introduction to Fungi in Soils

‘Soil’ Articles at Permaculture Reflections

July 17, 2015 by Douglas Barnes 1 Comment

Fungi are a vital component of soil life constituting 70% of the biomass in healthy soils. Within a gram of healthy soil, there are between 10 and 20 million fungi and between 3 and 300 metres of fungal hyphae (roots)!

There are three categories of fungi: saprophytes, mycorrhizal fungi and pathogens.

Pathogens, as the name suggests, are the harmful fungi that do damage to plants and are the source of many plant diseases.

Saprophytes (often called saprotrophs today), are decomposers. Though they make up less than 1% of soil fungi, they are important in recycling carbon, nitrogen, phosphorus and potassium. When you pile on the sheet mulch or do chop-and-drop mulching, saprophytes go to work breaking down that material and turning it into soil.

Mycorrhizal fungi are a plant’s best friend. What is really important for us in permaculture are connections. The hyphae of mycorrhizal fungi connect not only fungus to one plant but multiple plants. Furthermore, these mycorrhizae are the conduit for photosynthates (sugars and other carbohydrates that are the product of photosynthesis) and nutrients between plants of different species. Some fungi can even help certain species of tree better survive acid rain by assisting in the uptake of calcium.

Additionally, fungal hyphae also encourage beneficial bacteria. This soil life creates the vital crumb-like structure of healthy soil. Such soils are more easily penetrated by air, water and plant roots. Additionally, because soil with a crumb structure holds water better, it is more drought proof and less prone to water-logging.

Among the mycorrhizae are endomycorrhizae, which enters right into the cell wall of plants’ roots to exchange nutrients, and ectomycorrhizae, which pass between root cells but do not enter the cell wall.

One of the limiting factors to plant growth is the uptake of phosphorous. This is where mutualist mycorrhizae become vital. They scoop up the phosphorous in the soil and supply it to plants. The plants in turn supply the fungi with sugars.

Not every plant responds to mutualist fungi, however. Among plants that don’t are members of the amaranthaceae (think amaranth and Chinese spinach) including its subfamily chenopodiaceae (think beets and chards), many brassicaceae (the mustard family which includes broccoli, cauliflower, cabbage, kale, brussels sprouts, turnip and others), theaizoaceae family (iceplant) and the cyperaceae family (bulrushes, sedge, papyrus, etc.). Knowing this, one might see a pattern of degraded lands with poor mycorrhizae having many of these plants in them. Such lands can be repaired by deep mulching and innoculating the soils with samples of healthy soils.

Also, soils that are high in sodium, chlorine, boron, cadmium, zinc or manganese can be detrimental to fungi. Highly acidic soils damaged by acid rain may lead to the formation of aluminum sulfate or aluminum nitrate which is toxic not only to plants but to fungi as well.

To promote fungal life which leads to healthy soils, plant cover crops that will provide a permanent host for mycorrhizal fungi, avoid disturbing the land (ie. no-till agriculture), avoid the use of artificial fertilizers and do not use herbicides or pesticides.

Filed Under: Article Tagged With: fungi, soil

Image of compost

Compost in 18 Days

‘Soil’ Articles at Permaculture Reflections

August 4, 2009 by Douglas Barnes Leave a Comment

Fancy 2016 update:

We all know that compost is an excellent fertilizer for plants. It is also a sensible way to deal with organic wastes. In my climate, one can construct compost bins and dump his or her organic material in and, after two years time, finished compost is ready to go. Seriously, two years? I don’t need compost in two years, I need compost this year – this month! And if I keep throwing crud onto my compost pile for two years, it will be huge! Furthermore, I have to start new piles to let the old piles mature so that I am not digging through garbage to get down to my compost at the bottom. There has to be a better way. There is. When in doubt, let nature help out.

Microscopic workers

Lovely things bacteria. Different species of them have adapted to survive in almost any environment on earth. Some can even exist in temperatures that would burn your skin in seconds. In fact, some can generate that heat themselves. Enter into our story thermophilic bacteria. These little darlings seem to be ubiquitous, waiting for the right environment to present itself so that they can have their own little barbeque. If enough of their food is served to them in the right proportions with the right amount of water and just a touch of heat to start them off, they will hold their own little party and really get things cooking, literally.

So you’ve guessed by now that we are going to partner with these little bacteria to create our compost. Well they need to eat, so here’s the composting rule: If it has lived, it can live again. Forget what other composting guides have told you about no weeds and no meat, both those are fine. We are just concerned with carbon to nitrogen ratios. Thermophilic bacteria like a diet that has 25 to 30 parts of carbon for one part nitrogen (i.e. ratios of 25:1 to 30:1 carbon to nitrogen). Now, I don’t want you to get the impression that you need to go out and buy scales and weigh your garbage. It’s not like bacteria are as fussy eaters as cats. As long as you know basically what is carbon-rich and what is nitrogen-rich, you can make composting more of an art than a science.

Common compost ingredients

Compost ingredients and their carbon to nitrogen ratios
Material         Carbon:Nitrogen Ratio
   Bark (Hardwood) 223:1
Bark (Softwood) 496:1
Coffee grounds 20:1
Fish 3.6:1
Grass clippings 15:1
Leaves 54:1
Manure (Cattle) 19:1
Manure (Chickens) 10:1
Manure (Horse) 25:1
Manure (Pig) 14:1
Manure (Sheep) 16:1
Paper 800:1
Poultry scraps 5:1
Sawdust 500:1
Straw 80:1

Measuring compost ingredients

Again, you don’t need a scale. What you should take out of this is dry, brown things are high in carbon. Wet things that get stinky easily are high in nitrogen. Things that come out of your kitchen are going to be high in nitrogen. Dry plant scraps are going to be high in carbon. For most people, the hard part is going to be supplying the carbon, not the nitrogen. You might even need to hunt for someone else’s carbon-rich waste to get it. Your pile will basically be 2/3 carbon-rich material and 1/3 nitrogen rich material.

If you want to optimize speed, here’s a secret ingredient you can use: ash. Adding some fireplace ash will ensure that the pH doesn’t go too low. This will create a better environment for your bacteria, which will do the breaking down of the material.

A word of caution, though: If you use sawdust, make sure it is not from pressure treated lumber. Pressure treated lumber is impregnated with chromated copper arsenate, and unless your goal is cancer and cadmium poisoning leading to osteomalacia, you must avoid it at all costs. It is dangerous stuff.

Small pieces for faster composting

When I was a boy, I was not too good at cutting meat, particularly steak. I would pin the steak down and pry on it with my fork. The result all too often was that the steak would fly across the table and hit my older brother who frowned on that sort of thing. To avoid this, I would pick up the edge of the steak with my fork, bend down to my plate and chew on it. My mother frowned on this. She put a stop to this by cutting my steaks into small pieces for me. Problem solved.

Well, you need to do the same thing for your thermophilic bacteria. No, chucks of compost will not fly out of the compost pile and hit someone’s older brother if you don’t, but your pile will compost much better if you do. By chopping things up finely – ideally to pieces 1 cm long or less – you will be creating more surface area. More surface area means more area for more bacteria to munch away on the material in the compost pile. A small garden shredder can help you here. I have seen hand-powered choppers (a crank with a circular blade attached) in developing countries, but sadly I have not found such useful, human-powered choppers in Canada. If you like, you can throw in some larger, nitrogen-rich items once the pile has warmed up. The largest I’ve heard of was a roadkill rock wallaby. I was told that it melted away into nothingness inside the pile in about 6 days with only a shoulder blade remaining.

Mixing

Mix up your material – a pitchfork can really help you here. Add water it as you go until you can just squeeze a single drop from a handful of material. This is just the right amount of water for the bacteria to do their thing. Also, to get the thermophilic reaction going, there needs to be enough material for a sort of “critical mass” to occur. This will occur when piles are 1 cubic metre or larger. What this means in practice is a pile that is about shoulder height.

Day 4

With the mixing done and the watering right, set a tarp over the pile and leave it 4 days. (The tarp is so that neither rain nor evaporation messes up your water content.) On the 4th day, turn the pile with a pitchfork. Don’t skip the turning part because we are dealing with aerobic bacteria. They need air. Just put the top and sides in a pile next to the current pile and put what’s left of the old pile on top, checking to make sure the water content is right (by squeezing the material) as you go. Now the pile will essentially be inside-out. Once you rake the last bits of the old pile onto the new pile, it’s ready to cover up with the tarp. Have a beer if you like.

Day 6

On the sixth day, take the tarp off and stick your arm in the pile. If everything is going correctly, you will instantly pull your arm out, cursing my name. If the pile is composting properly, it should be around 70ºC inside – literally hot enough to cook with. This is why it is ok to put weeds in. Any weed seeds will be cooked to the point that they are not viable (if they aren’t just melted away in the compost). Turn the pile again checking the water content as you go. Sorry about burning your arm. Have a beer, you deserve it.

From Day 6

After day 6, turn the pile every 2 days, checking the water content as you go and putting the tarp back over the top each time. After about 18 days, you will have finished compost. If things are a little cooler where you are, it may take longer. If they are hot, you might match the best time I’ve heard, which is 11 days.

Troubleshooting

Things don’t always go according to plan. Here’s what to do if they don’t:

On day 6, you grit your teeth, stick your arm in the pile and find it is not hot. Is the pile big enough? One cubic metre is really big. If it’s not really big, make it bigger. If it is big enough, is it too wet? If it is, spread the material out and let it dry a bit. Is it big enough and not too wet and not too dry? Then there is not enough nitrogen.

Inside the pile is there a white powdery substance? If so, there is too much nitrogen, Add carbon, check the water content and cover the pile with a tarp.

Does it smell bad? Good compost piles don’t smell bad. If it smells foul, add more carbon.


Adding compost to design

If you live in frosty climates like I do, composting like this is limited to the warm seasons. However, if you have a greenhouse and are willing to sacrifice some space for a pile, you can compost inside the greenhouse. A nice little feedback effect occurs where the heat of the greenhouse allows the thermophilic bacteria to take hold, which, in turn, help to heat the greenhouse. There are people who heat their greenhouses with compost every winter. Similarly, larger piles that are not turned can heat water by running plastic plumbing pipe inside the tube. French innovator Jean Pain used to heat water to 60ºC in 40-tonne piles that would cook for 18 months.

Happy composting

Filed Under: Article Tagged With: soil

Trametes versicolor

‘Soil’ Articles at Permaculture Reflections

March 19, 2009 by Douglas Barnes 2 Comments

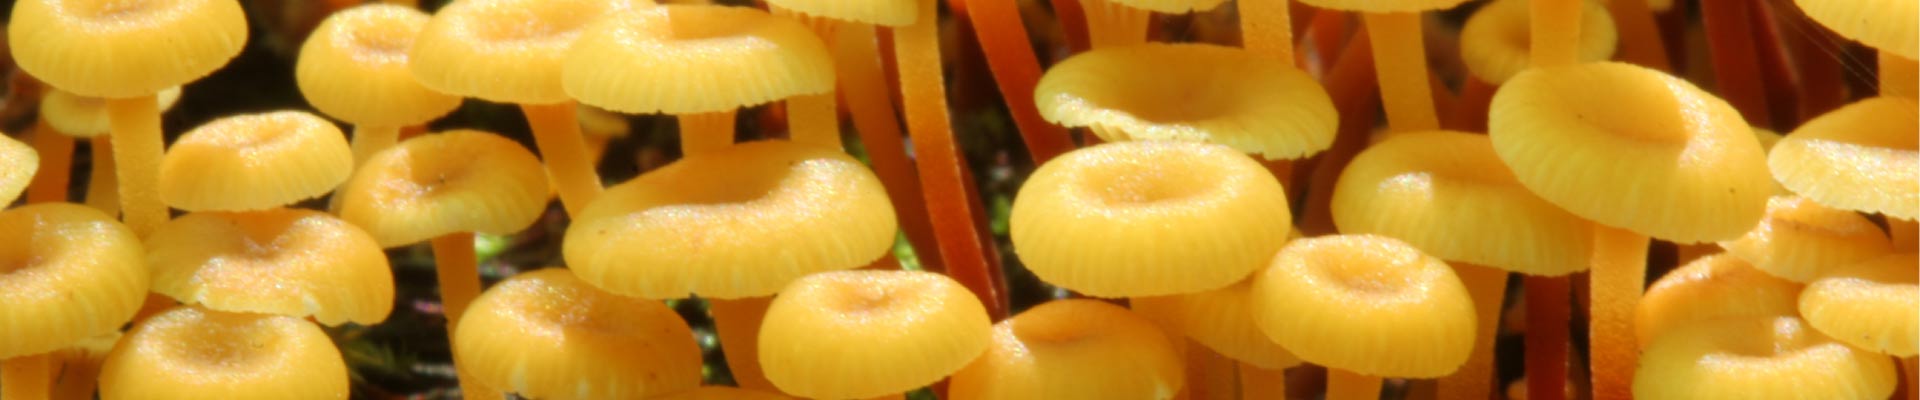
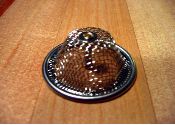
Being a mushroom nut, it has taken all the discipline I can muster not to have a fungal species as Species of the Month yet. I can wait no longer. This month’s species is Trametes versicolor, the turkey tail or yun zhi mushroom. This saprophytic, polypore mushroom is a white rot mushroom, meaning that it breaks down lignin (the organic polymer that gives trees their strength). This mushroom is found in boreal, temperate, sub-tropical and tropical regions.

It has multiple uses. In the field of health, it has been shown to combat cancer. The cancer drug Krestin, also known as polysaccharide K or PSK, is derived from T. versicolor. It has anti-tumour properties, inhibiting cancer cell growth. It inhibits leukemia cell growth. Alcoholic extracts of T. versicolor are used to help fight prostate cancer. It stimulates the immune response. It helps the spleen recover from gamma radiation. PSK has antibiotic properties against E. coli, Staphylococcus aureus, Pseudomonas aeruginosa, Candida albicans, Cryptococcus neoformans, Listeria monocytogenes, and Streptococcus pneumoniae. In-vitro studies show it inhibiting HIV replication.

It has many uses for bioremediation. It can be grown on woodchips in burlap bags. The bags can then be stacked in runoff channels below animal paddocks to filter E. coli, Listeria, Candida and Aspergillus, protecting watersheds from contamination.

The research of mycologist and permaculturist Paul Stamets suggests T. versicolor might be effective in out-competing pathogenic fungi like Armillaria spp., Sparassis crispa and Hypholoma capnoides.

Heat-killed mycelium of T. versicolor has been used to absorb up to 97% of mercury ions from water, suggesting its value to clean water systems.

It is also very valuable in either breaking down or bioaccumulating some of the worst manmade pollutants in our environment, among them antracenes (used in dyes, wood preservative, naphthalene and other products), chromated copper arsenate (used in pressure-treated lumber), dimethyl methylphosphonates (used in VX, sarin and soman chemical war agents), dioxins, persistent organophosphates (used in pesticides), pentachlorophenols (used in pesticides and preservatives), and TNT.

This fungi grows well on hardwood, including apple and cherry (unlike other fungi), as well as on fir, pine, spruce, larch, cypress and juniper. It can be harvested in the wild (in which case, only pick 25% of a patch of turkey tails), or cultivated on logs raised off the ground or in pots filled with sand. Tree stumps can also be used to cultivate turkey tails. It produces mushrooms annually from spring to late fall, though mushrooms usually appear most in the late summer.

The mushroom itself is very tough and leathery, and you will need a knife to harvest it. It can be boiled and used in soups or drunk as tea. The flavour is a little bitter, but compared with many other polypore mushrooms, the bitterness is mild. In a soup with other flavours, the bitterness will go unnoticed.

Filed Under: Article Tagged With: fungi, soil

Rhizobium Symbiosis with Woody Plants: Leguminous Nitrogen-Fixing Trees

‘Soil’ Articles at Permaculture Reflections

February 26, 2009 by Douglas Barnes 1 Comment

Key points:

  • 3 subfamilies of the legume family can fix nitrogen
  • Symbiotic bacteria (Rhyzobium) convert nitrogen in the air to a form plants can use
  • Repair damaged land in tropical and arid regions with initial plantings of 90% nitrogen fixers

As mentioned in the previous article in this series, beneficial partnerships are the way of nature. In particular, some microbes (Frankia and Rhizobium) form associations with certain plants allowing them to fix atmospheric nitrogen into a form that plants can use. These symbiotic partners can help us to rehabilitate damaged landscapes, preparing the soil for a succession of more long-term plants.

Rhizobium nodule

This piece focuses on woody plants that associate with the bacteria of the genus Rhizobium. We can see from the diagram below that there are 3 subfamilies of the family Fabaceae (AKA Leguminosae). These families are Faboideae (AKA Papilionoideae), Mimosoideae, and Caesalpinoideae. Note that not all the trees in these subfamilies are nitrogen-fixers. Among the Caesalpinioideae, 23% are nitrogen fixers. For Mimosoideae, the figure is 90%, and for Faboideae, 97% are nitrogen-fixers.

Nitrogen fixers using Rhizobium

As the diagram shows, Mimosoideae contains the nitrogen-fixers Acacia, Albizia, Calliandra, Enterolobium, Leucaena, Mimosa, Paraserianthes, and Pithecellobium. Caesalpinoideae‘s nitrogen-fixers are Chamaecrista, Cordeauxia; and Faboideae has Cajanus, Dalbergia, Erythrina, Flemingia, Gliricidia, Pterocarpus, Robinia, Sesbania, and Tephrosia.

To rapidly revegetate a damaged landscape, be sure to include plenty of these species to help quickly build up the soils. In areas of very problematic soil, such as arid, tropical and subtropical regions, make 90% of your initial planting of trees nitrogen fixing, pioneer species (associating with either Frankia or Rhizobium), and 10% of species your long-term canopy overstory species. When the system reaches maturity, the proportions will be reversed with 10% nitrogen-fixing, support species and 90% canopy species. The same formula could be followed for humid temperate regions, but the soils in these area are not so fragile and can stand a lower percentage of nitrogen fixers. A 70/30 or even lower may suffice in these areas, as the seasonal cycles of death and regrowth feed these soils well.

As the diagram below shows, the nitrogen-fixing support trees can be pruned (coppiced, pollarded, shredded or sacrificed) to provide mulch, fodder, fuel or fibre. As this is done, the roots of the tree self-prune, releasing nitrogen into the soil.

Chop and drop

The highest concentrations of nitrogen are to be found in descending order in the seeds, the seed pods, the flowers, the leaves and then the woody parts of the tree. Inter-planting with fruit or nut trees naturally provides more soil nitrogen. But interplanting also makes the job of chop-and-drop mulching that much easier.

Nitrogen-fixing support trees

Filed Under: Article Tagged With: soil, trees

Woody Actinorhizal Plants

‘Soil’ Articles at Permaculture Reflections

January 28, 2009 by Douglas Barnes Leave a Comment

  • Read about Rhizobium Symbiosis with Woody Plants here

Dogs don’t eat dogs. At least normal, healthy dogs don’t eat dogs. So, if anyone tells you “It’s a dog-eat-dog world,” smile submissively and slowly back away – you are dealing with a sociopath. The world is, on the whole, a symbiotic dog-help-dog world. Why, even dogs help dogs! Nitrogen-fixing plants are one example of the general pattern of symbiosis.

Plants release an average of 40% of their photosynthates (the products of photosynthesis) out their roots. They don’t do this out of inherent inefficiency. These chemical compounds are doing tasks such as sending signals to call in mycorrhizal fungi and feed those fungi, to share with beneficial nitrogen-fixing and other bacteria, or to make soil nutrients more soluble and available for uptake by the roots.

Among woody nitrogen-fixing plants, there are two varieties: those associating with the bacteria Rhizobia; and those associating with the topic of this article, the actinomycetes Frankia. Actinomycetes are a type of bacteria that grow in long chains of filaments resembling the hyphae, or hair-like roots, of fungi.

Among the woody nitrogen-fixers in temperate regions, actinorhizal plants are an important group. These pioneering plants are able to grow in poor soils, enriching them with nitrogen and organic matter. This makes them very valuable in repairing disturbed or damaged soils.

The diagram below shows the 7 families of woody actinorhizal plants and their 23 genera (I left out the one herbaceous family, the Datiscaceae in the diagram, but it’s in the table).

Actinorhizal families and genera

Plants associated with the actinorhizal bacteria Frankia
Family Genera
   Betulaceae Alnus
Casuarinaceae Allocasuarina
Casuarina
Ceuthostoma
Gymnostoma
Coriariaceae Coriaria
Datiscaceae Datisca cannabina
Datisca glomerata
Elaeagnaceae Elaeagnus
Shepherdia
Hippophae
Myricaceae Comptonia
Myrica
Morella
Rhamnaceae Ceanothus
Colletia
Discaria
Kentrothamnus
Retanilla
Trevoa
Rosaceae Cercocarpus
Cowania
Dryas (some)
Purshia

To rapidly revegetate a damaged landscape, be sure to include plenty of these species to help quickly build up the soils. In areas of very problematic soil, such as arid, tropical and subtropical regions, make 90% of your initial planting of trees nitrogen fixing, pioneer species (associating with either Frankia or Rhizobium), and 10% of species your long-term canopy overstory species. When the system reaches maturity, the proportions will be reversed with 10% nitrogen-fixing, support species and 90% canopy species. The same formula could be followed for temperate regions, but the soils in these area are not so fragile and can stand a lower percentage of nitrogen fixers. A 70/30 or even lower may suffice in these areas, as the seasonal cycles of death and regrowth feed these soils well.

Filed Under: Article Tagged With: soil, trees

Killing Soil With Synthetic Nitrogen

‘Soil’ Articles at Permaculture Reflections

March 25, 2008 by Douglas Barnes Leave a Comment

Soil is like air. It is a simple thing that gets overlooked and it gets a bum rap: it’s “just dirt.” But “just dirt” is where the nutrients that keep plants healthy come from. And even for people who refuse to eat vegetables, plants are ultimately the source of nutrients in human nutrition. In other words, without healthy soil, there is not healthy food. And without healthy food, there are no healthy people. This often overlooked fact has been a factor in the collapse of many a civilisation and no civilisation that ruined its soil has survived, so we ignore it at our peril.

Permaculturists know that the use of synthetic fertilisers are a great way to damage soil life, but new research shows that the overall effect is actually very dramatic.

Research farm
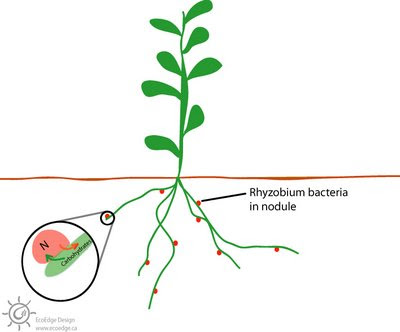
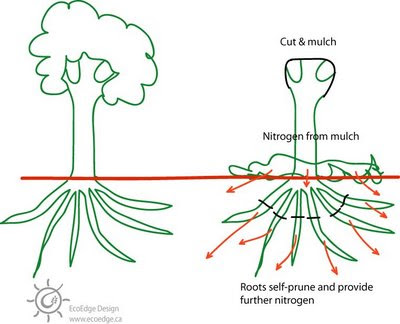
Saeed Khan, Richard Mulvaney, Tim Ellsworth, and Charlie Boast, soil scientists from the University of Illinois, found that in one of the University’s Morrow Plots the growth and yields of corn were 20% lower than in another plot.1 Conventional theory would predict the poorly performing plot would have been the better performing one as it received greater inputs of nitrogenous fertilizers and crop residues.

According to Saeed Khan, “What we learned is that after five decades of massive inputs of residue carbon ranging from 90 to 124 tons per acre, all of the residue carbon had disappeared, and there had been a net decrease in soil organic carbon that averaged 4.9 tons per acre. Regardless of the crop rotation, the decline became much greater with the higher nitrogen rate.”

The effect is not limited to this one case, either. Charlie Boast points out that “In numerous publications spanning more than 100 years and a wide variety of cropping and tillage practices we found consistent evidence of an organic carbon decline for fertilized soils throughout the world and including much of the Corn Belt besides Illinois.”

Adding soluble nitrogenous fertilizers pushes soil away from a fungal-based soil to a bacterial-based soil (mycorrhizal, saprophytic and epiphytic fungi can greatly boast plant health and yield). But it appears that, in the long run, the addition of synthetic nitrogenous fertilizers makes the soil less hospitable to bacteria as well.

Furthermore, the addition of too much phosphorus kills off fungi; and fungi produce glomalin, which makes up 27% of carbon in soils.2 Glomalin is also very stable in soil, lasting from an estimated 7 to 42 years. And as CO2 levels increase, mycorrhizal fungi respond by increasing the amount of glomalin produced (responding in accordance with the predictions of the Gaia hypothesis). We cannot afford to kill off this natural climate regulator simply for the convenience of running our agricultural systems like a factory.

This loss of carbon not only hinders soil life, it also reduces the water storage capacity of soil as well. The loss of life in the soil will damage the soil structure leading to increased erosion. The loss of carbon in the soil also means more nitrate pollution from runoff as the excess fertiliser not taken up by the plant (i.e. most of the fertiliser) washes away with rainfall and irrigation, polluting aquatic systems. And if that were not enough, the carbon is lost to the atmosphere in the form of CO2, increasing greenhouse gas emissions.

Imagine the effects of a holistic approach to soils. It is reasonable to expect that more than 4.9 tons per acre could be sequestered in soils rehabilitated to maximize soil life.3 But taking 4.9 tons as a conservative figure, the U.S.’s 434 million acres of cultivated land could sequester 2.1 billion tons of carbon, were it to be shifted to ecological farming methods.4

Organic soils have higher numbers of Trichoderma and Piriformospora species of mycorrhizal fungi which help protect against the parasitic Fusarium fungi.5 Fusarium produces vomitoxin, which is not destroyed in the cooking process. Its associated risks include cancer and birth defects. Fusarium also contains the chemical warfare agent fusariotoxin. Infected crops are unfit for human food or animal feed. Losses can be significant, as well. In 2002 for example, farmers in Manitoba, Canada suffered $100 million in losses due to fusarium.6 It is worth noting that the addition of glyphosate has been found to stimulate the growth of fusarium,7 so following conventional practices greater risks on human health and introduces the possibility of increased losses for the farmer. [Good luck to conventional farmers. The latest news is that the most popular brand of glyphosate, which also happens to have a surfactant that is deadly to amphibians,8 has now doubled in price from last year.9]

Once upon a time, farmers needed to respect soil life. Since the Second World War, however, agriculture has been incorrectly reduced to an industrial process with the belief that simply supplying the right parts (mixes of crop nutrients) is all there is to manufacturing the agricultural product. What we have actually managed, though, is to damage more land in a shorter period of time than any other period in history. And we are doing it on a scale that is global. We can live without oil (believe it or not). We can live without silicon chips. We can even live without industrial manufacturing. We simply cannot live without healthy soil.

The solution is, luckily, simple. Stop wasting money by giving it to chemical manufacturers for products (biocides, etc.) that reduce yield. Stop relying on chemical manufacturers for fertility. Stop wasting energy by ploughing. Instead, recognise that life is interconnected. Build a healthy soil ecosystem and you will be rewarded with healthy plants. But if you approach nature with the ill-conceived metaphor of the machine, you can expect that “machine” to perform poorly.

1. Study reveals that nitrogen fertilizers deplete soil organic carbon http://www.eurekalert.org/pub_releases/2007-10/uoia-srt102907.php
2. Glomalin: Hiding Place for a Third of the World’s Stored Soil Carbon http://www.ars.usda.gov/is/AR/archive/sep02/soil0902.htm
3. The mass of bacteria per acre of healthy soil is around 70,000 pounds with only 4500 lb to 5400 lb in ploughed soils (80,000 kg per hectare and only 5 to 6,000 kg per hectare of ploughed land). The figure for actinomycetes would conservatively be around 8,000 kg per Ha (about 7140 lb per acre) but could reach as high as 80,000 kg/Ha (about 70,000 lbs per acre). And after adding the mass of the fungi, protozoa, algae, nematodes, earthworms (one to 1.5 million per acre of healthy soil, not including their castings), and arthropods in the soil, the figure of 4.9 tons per acre more for healthy soils is not a radical estimate at all.
4. Based on figures from the 2002 USDA Census of Agriculture.
5. Bulluck, III, L.R., Brosius, M., Evanylo, G. K. and Ristaino, J. B. 2002. Organic and synthetic fertility amendments influence soil microbial, physical and chemical properties on organic and conventional farms. Applied Soil Ecology 19:147-160 cited in Ho, Mae-Wan and Ching, Lim Li. 2004. GMO Free: Exposing the Hazards of Biotechnology to Ensure the Integrity of Our Food Supply. Vital Health Publishing, Ridgefield, CT; Deshmukh, SD; Kogel, KH. 2007. Piriformospora indica protects barley from root rot caused by Fusarium graminearum. JOURNAL OF PLANT DISEASES AND PROTECTION. 114(6):263-268.
6. Suzuki, D. Dressel, H. 2004. Naked Ape to Superspecies: A Global Perspective on Humanity and The Global Eco-Crisis. Allen & Unwin, Crows Nest, NSW, Australia; Boswell, Randy. 19 August, 2003. Roundup May Harm Wheat: Researcher’s Say Monsanto’s Popular Weedkiller Might Boost Blight. The Leader-Post. Regina, p. A1
7. Coghlan, Andy. August 14, 2003. Weedkiller May Boost Toxic Fungi. New Scientist; Suzuki, D. Dressel, H. 2004. Naked Ape to Superspecies: A Global Perspective on Humanity and The Global Eco-Crisis. Allen & Unwin, Crows Nest, NSW, Australia; Boswell, Randy. 19 August, 2003. Roundup May Harm Wheat: Researcher’s Say Monsanto’s Popular Weedkiller Might Boost Blight. The Leader-Post. Regina, p. A1; Bigwood, Jeremy. August 20, 2003. Scientists Link GM Crop Weed Killer to Powerful Fungus. IPS; Rahe, J. Can. J. Bot. 33 (1987): 354-360., Appl. Soil Ecol. 8 (1998): 25-33 cited in Scientists Expose Myths that Organic Farming Produces Dangerous E-coli and Plant Diseases http://www.organicconsumers.org
8. Roundup®highly lethal to amphibians, finds University of Pittsburgh researcher http://www.eurekalert.org/pub_releases/2005-04/uopm-rhl040105.php
9. Farmers Feeling Roundup Spike http://www.agbios.com/main.php?action=ShowNewsItem&id=9425

Filed Under: Article Tagged With: soil

Increased Drought tolerance and Resistance to Salinity Through Fungi

‘Soil’ Articles at Permaculture Reflections

January 13, 2008 by Douglas Barnes Leave a Comment

Here we look at two recent discoveries showing how mycorrhizal inoculation can help plants better survive drought and salinisation.

In one study (Marulanda, A, et al. Drought tolerance and antioxidant activities in lavender plants colonized by native drought-tolerant or drought-sensitive Glomus species. MICROBIAL ECOLOGY), researchers looked at drought-tolerant species of the mycorrhizal fungi Glomus (namely drought-tolerant strains of Glomus intraradices and Glomus mosseae ) and their effects on drought-tolerant Lavandula spica (lavender). Drought tolerant strains of Glomus intraradices showed 35% greater root mass growth in the lavender compared to the regular strains of G. intraradices. And the drought tolerant Glomus mosseae showed 100% greater root mass compared to regular strains of G. mosseae.

Other beneficial effects included an increase in water content in the plant and decreases in antioxidants which would hurt plant health in times of drought. Plants with the drought tolerant strain also had higher levels of nitrogen and potassium compared to the non-drought tolerant Glomus species.

I think one could reasonably expect that the less drought tolerant strains would still be better than an absence of any mycorrhizal fungi. Nevertheless, the drought resistant strains would be a very useful and welcome addition to arid and semi-arid systems.

The following is an excerpt from the study’s abstract:

This study compared the effectiveness of four arbuscular mycorrhizal (AM) fungal isolates (two autochthonous presumably drought-tolerant Glomus sp and two allochthonous presumably drought-sensitive strains) on a drought-adapted plant (Lavandula spica) growing under drought conditions. The autochthonous AM fungal strains produced a higher lavender biomass, specially root biomass, and a more efficient N and K absorption than with the inoculation of similar allochthonous strains under drought conditions. The autochthonous strains of Glomus intraradices and Glomus mosseae increased root growth by 35% and 100%, respectively, when compared to similar allochthonous strains. These effects were concomitant with an increase in water content and a decline in antioxidant compounds: 25% glutathione, 7% ascorbate and 15% H2O2 by G. intraradices, and 108% glutathione, 26% ascorbate and 43% H2O2 by G. mosseae. Glutathione and ascorbate have an important role in plant protection and metabolic function under water deficit; the low cell accumulation of these compounds in plants colonized by autochthonous AM fungal strains is an indication of high drought tolerance.

The second study on the effects of Glomus fasciculatum on the salt tolerance of Acacia nilotica (Giri, B, et al. 2007.Improved tolerance of Acacia nilotica to salt stress by arbuscular mycorrhiza, Glomus fasciculatum may be partly related to elevated K/Na ratios in root and shoot tissues. MICROBIAL ECOLOGY), higher nutrient levels were observed in trees inoculated with the mycorrhizal fungi Glomus fasciculatum where soil was salinated.

The United States Department of Agriculture considers soil over 4 dS/m to be “saline soil.”The study looked at uninoculated trees and inoculated trees at salt levels of 1.2, 4.0, 6.5, and 9.5 dS per metre. In the inoculated plants, higher biomass in root and shoot was observed, showing that fungi assisting in plant growth. Inoculated trees had higher levels of phosphorus, zinc and copper than their uninoculated counterparts. And interestingly, in the lower levels of salt, inoculated trees took up more sodium (1.2 and 4.0 dS/m) than the control trees. At higher levels (6.5 and 9.5 dS/m), the sodium levels decreased whereas the control trees took up more sodium. And as salinity increased, the absorption of potassium in the inoculated trees increased. These results show that Glomus fasciculatum fungi increases the health of Acacia nilotica in saline conditions when compared to uninoculated Acacia nilotica. It is reasonable that this species of Glomus and possibly others could benefit other species of trees in saline conditions as well.

They found that at the higher level of salt (9.5 dS/m), the mycorrhizae had a harder time being established. Designers might offset this somewhat with swales. This would allow fresh rainwater to hold in the soil, reducing the salt content over time. Where salty water tables are a problem, appropriate trees can be used to pump down the water table, thereby removing salt from the upper levels. Whether or not Glomus spp. could help tree species used in this way to pump down salty water tables remains to be seems; but it is very plausible.

A pot experiment was conducted to examine the effect of arbuscular mycorrhizal fungus, Glomus fasciculatum, and salinity on the growth of Acacia nilotica. Plants were grown in soil under different salinity levels (1.2, 4.0, 6.5, and 9.5 dS m(-1)). In saline soil, mycorrhizal colonization was higher at 1.2, 4.0, and 6.5 dS m-1 salinity levels in AM-inoculated plants, which decreased as salinity levels further increased (9.5 dS m-1). Mycorrhizal plants maintained greater root and shoot biomass at all salinity levels compared to nonmycorrhizal plants. AM-inoculated plants had higher P, Zn, and Cu concentrations than uninoculated plants. In mycorrhizal plants, nutrient concentrations decreased with the increasing levels of salinity, but were higher than those of the nonmycorrhizal plants. Mycorrhizal plants had greater Na concentration at low salinity levels (1.2, 4.0 dS m-1), which lowered as salinity levels increased (6.5, 9.5 dS m-1), whereas Na concentration increased in control plants. Mycorrhizal plants accumulated a higher concentration of K at all salinity levels. Unlike Na, the uptake of K increased in shoot tissues of mycorrhizal plants with the increasing levels of salinity. Our results indicate that mycorrhizal fungus alleviates deleterious effects of saline soils on plant growth that could be primarily related to improved P nutrition. The improved K/Na ratios in root and shoot tissues of mycorrhizal plants may help in protecting disruption of K-mediated enzymatic processes under salt stress conditions.

The moral of the story reaffirms what we already know: Healthy soils with mycorrhizal fungi allow for healthier plants, particularly in difficult situations.

Filed Under: Article Tagged With: fungi, soil

Waste and Worms

‘Soil’ Articles at Permaculture Reflections

January 14, 2007 by Douglas Barnes Leave a Comment

by Scott A. Meister

Every household, every cafe, every restaurant, every place where humans are active, produces raw, organic waste.

What happens to this waste, and what does it do when it leaves our front door?

We pay taxes, to have municipal or privately owned trucks drive through our cities and streets every week or more to pick it up and have it sent to either a landfill, or an incinerator.

If the waste goes to a landfill, it starts decomposing, creating greenhouse gasses such as methane gas and Co2, which destroy the ozone layer, and contribute to global wrming. Landfills smell, and often become places that give birth to disease, and pollute groundwater supplies with hazerdous waste.

If the waste goes to an incinerater, mind boggling amounts of fossil fuel energy is wasted, to burn it into smaller pieces of ash, that float up into the atmosphere, perhaps into the jet stream, only to come down somewhere else. This again contributes to global warming, Co2 is again released, and the ash and gasses combine to contribute to diseases and respiratory illnesses such as asthma, lung cancer, hayfever, allergies, and a host of other costly health problems.

In effect, we are wasting our hard earned money and precious fossil fuels on the illusion that we are throwing things away. There is no such thing as “away.” The earth is a closed system that we all share.

We are currently paying money to destroy our environment and make ourselves sick, only to have to spend more money to “clean up” our environment later, and to pay hospitals, doctors and pharmacies in an attempt to make us well.

This is a negative use of our time, money and resources. It’s a never ending negative cycle.

I wish to show you a positive way to use our raw organic waste, to have a positive effect on our environment, our health, and our wallets. We can make our waste work for us instead of against us. We can profit from it, instead of paying to have it hurt us.

To do this,we need a little help from a friend. It is a lifeform that we have often been taught to avoid. Many people have been indoctrinated into fearing it, or thinking it is disgusting. It’s easily found in the soil on every land mass on earth accept antarctica. It’s the earthworm.

Contrary to many people’s opinions, earthworms are not disgusting. They are amazing. Without worms, we humans could not inhabit most of the land we do today. If we were to dissappear tomorrow, the rest of the world, including worms, would continue to exist without a single problem. However, if worms were to dissappear from the earth, our ecosystems would collapse. Worms are, in fact, harmless. “They do not harbor any bacteria or viruses harmful to humans, and are completely free of parasites. They eat harmful organisms and excrete masses of beneficial organisms in their droppings, known as worm casts.” (Murphy) In fact, worms have the ability to neutralize harmful bacteria, such as Ecoli, while simultaneously producing beneficial bacteria and also increasing the levels of nitrogen and potassium in the soil; just a couple of the elements necessary for all plants to grow. http://www.wormdigest.org/content/view/307/2/

Earthworms are actually the managers of the soil world. We depend on a healthy soil world for all of our food. Worms breakdown decaying organic matter and move the soil making air pockets, and water channels so that air and water can reach the other lifeforms below the soil, and make it available to plants too. They break-down organic material such as leaf litter, decomposing fruit and fecal matter from animals making. Doing this makes valuable nutrients available for the roots of plants, and for other forms of life in the soil. Worms are breaking down decaying matter 24 hoursa day, matter that would otherwise be releasing harmful gasses into the atmosphere or being burned to harmful ashes in an incinerator.

When earthworms break down organic matter, they produce two very valuable things: Worm castings (clean worm poop) and worm tea (clean worm pee). By doing so, they stop decaying organic matter from releasing dangerous greenhouse gasses and Co2. In the process, they are, in fact, producing the two most valuable forms of organic fertilizer known to man. Worm castings and worm tea, are mother nature’s fertilizer, and mother nature is the best gardener on earth.

Lori Marsh (Extension Engineer, Biological Systems Engineering Department, Virginia Tech) says, “You can process one-half pound of food scraps per day for each square foot of worm bin surface area. For example, a bin that is 18 inches by 24 inches (18/12 x 24/12) is 3 square feet in surface area and can process about 10.5 pounds of food a week (3 sq ft x 1/2 lb/ft sq/day x 7 days/week = 10.5 lbs).“

We can use these worms to help us convert our organic kitchen and house waste into a valuable form of fertilizer/soil conditioner that we can either use in our garden, sell to others, trade or give away. Worms are also great at reproducing, due to the fact that, being hermaphrodites, every worm has the ability to reproduce. Just two worms, have the ability to become over a million in just about a year. With this is in mind, we could even be good stewards of the earth, and simply give it back a few of them back to natural environments we have around us.

We can benifit from using worms wherever humans live, by building a worm farm.

There are many different types of worm farms: stacks of old tires, wood boxes, styrofoam boxes and my favorite, the recycled sink or bathtub.


Some of these cost lots of money, and others require some woodworking skills to construct. Others require lots of embodied energy to manufacture and ship to your home. Some are only suitable to use in areas where there is lots of space. Here in Tokyo, as in other cities, space is in limited supply. This is why I’m going to teach you how to build your own worm-condo, or in Japanese, a “Shimamimizu-Mansion.”

My version of the worm condo is easy both easy to build (is fashionably blue) and easy to use in an urban environment like Tokyo, where space is a valuable commodity. It can easily be placed on a balcony, or perhaps even under a sink or in a cupboard.

What you need, and how to make it:

First I went to my local home center and bought three plastic containers and two lids. Each container was about 350yen and the lids were 150 yen. Then I bought a small stainless steel mesh bathroom or kitchen drain catch for 350 yen, a sheet of stainless steel mesh for 500 yen, and a couple small thin slats of wood for a total of 200 yen.

The total cost was about 2,500 yen, or roughly $28-$30 U.S. (at rates based on the time of writing). Just to put this into perspective, the pre-manufactured worm condo pictured above costs around $169 U.S. or 26,900 yen (roughly $300 U.S.) to have shipped to Japan (then you also have to think about the other embodied energy costs).

Next, I went home and used a box cutter to first cut out the raised portion of the lids to make room for an air breathing screen that will also allow in moisture without letting in insects or other pests.

On the underside of the lid, I super-glued (super-glue already on hand at home) the mesh screen between the plastic of the lid, and one thin slat of wood which I cut to size.

Next, in the bottom of one of the plastic containers, I cut a hole with a drill to make room for the stainless steel mesh drain catch. This will be our first worm-bed and will allow the worm-juice to drain into a recycled jam-jar that I will place below it in the container below.

In the bottom of the second container, I took a power drill and made a lot of small holes in various sizes. This will be the second story of our worm-condo. These holes will allow the worms to move up into a second story of waste, allowing us to harvest the casting from below, and seperating the worms from their finished castings so they don’t start to die. (**please note: the picture was taken to show what is happening, it is not a safe way to drill holes into a container, please use common sense and rules of safety when handling power tools)

So, there we have it. About 2,500-2,800 yen and an hour of labor later, we are finished.

HOW IT WORKS:

The first container holds our jar and perhaps a small garden scoop to remove castings and stir the worm bedding or cover the waste. The second container (the one with the drain) sits on top with the drain positioned above the jar. (Of course, we will always put the screened lid on top).

The worms will start their work here, and when the container is full, we will place the third container (the one with all the many holes drilled into it) on top.

When the worms are finished with the first container, they will slowly move up through the holes into the next level. When all or most of the worms have moved up to the next level, we can remove the top level, and harvest our worm castings from below. Any worms still left in the castings can be added to your garden, sold as fish-bait, given to friends, or put back into the top container.

When the first container is empty. Place all the contents of the top container back into the first container along with a little of the finished product and start the process all over again.

I should mention, that there is no need to just use these two levels. You could continue adding as many containers with holes drilled in the bottom as you wish. In fact, it may be a good idea to add a couple more levels just to help keep up with the worms being created, and the waste being supplied.

WHAT KIND OF WORMS?

Many people are surprised to find out that there are more than 4,400 named species of earthworm on this planet and they have been broken into three categories. There are Endogeic, Anecic and Epigeic earthworms. Only worms from the Epigeic category should be used in worm-farms. The worms from the Endogeic and Anecic category are burrowers, and most of their lives underground eating soil. Their purpose in nature is to break down soil to make nutrients available to plants, and to physically move the earth, changing its structure to allow air and water down below. Their burrows are sometimes up to 6 feet deep. In short, they improve drainage and texture of the soil

Worms from the Epigeic category are known as top-feeders, and they are the ones that come up to eat decaying organic matter, turning it into nutrients for the soil and moving it below.

The best worms to use for this kind of compost are top feeding epigeic worms, specifically Eisenia Fetida (a.k.a.: red wiggler, brandling and manure worm or in Japanese: Shima-mimizu)

and Lumbricus rubellus Hoffmeister.

How can you tell what worm you have? From the way it’s been explained to me (it’s still hard for me to tell) usually, Eisenia Fetida and Lumbricus rubellus Hoffmeister have more of a reddish color on one side of it’s belly than another, and they usually have clearly defined reddish stripes.

On the other hand, burrowing worms (the ones we don’t really want) are usually a little more grey or yellow in color, and you can usually see that their bellies are full of soil. If you find a worm hole, with a mound around the entrance, it is a worm of the Anecic category. If you find the worms in a pile of decaying leaf-litter, then it is most likely of the Epigeic category.

Eisenia fetida is found on nearly every land mass of this planet, with the exception of Hawaii. You should not have a problem finding them. With some good detective work, you may be able to find somebody near you that has a supply. In the U.S. you can buy them at garden centers, but I have yet to find a garden center in Japan that sells them. I’m sure that a little googling will help you find a source to get your worms.

We need to use these kinds of worms, because they will move upward in the mansion, and not burrow down where they will most likely drown in their worm tea. We can also create their perfect environment in a worm-farm for these types of worms. These worms have an amazing appetite for organic waste, get along well in high-density populations and tolerate a wide range of environmental conditions such as temperature.

One extra, added benifit of using Lumbricus rubellus Hoffmeister is that it has been found to be tolerant of toxic levels of arsenic. Therefore, they can be of use in detoxifiing land poisoned by levels of arsenic that would be lethal to most other lifeforms. They also prefer a wet environment, so are ideal for plastic worm farms that tend to have a higher moisture content.

“[Lumbricus rubellus Hoffmeister is] resistant to very high concentrations of arsenate have colonised abandoned copper/arsenic mine and tungsten mine spoils that contain up to 50,000 ppm As on a soil dry weight basis (Langdon et al., 1999, 2001). This level of arsenic would be fatal for most earthworms (and other animals), therefore the physiological capability of these earthworms to become established on arsenic-contaminated soil must involve a mechanism for detoxifying accumulated arsenic in their tissues. The mode of arsenic detoxification in earthworm tissues is not clear, although biochemical analyses (Langdon et al., 2002) and sub-cellular localisation studies (Morgan et al., 1994) indicate that As3+-thiol (sulphur binding) complexes are probably involved. The cysteine-rich metalloprotein, metallothionein (MT), is a strong candidate thiol donator. It is not known whether arsenic in any of its oxidation states is able to induce MT expression in earthworms, but the presence of MT has been identified in earthworms taken from arsenic-contaminated soils (Stürzenbaum et al., 2001).”
http://srs.dl.ac.uk/Annual_Reports/AnRep02_03/worm.htm


WHAT TO FEED YOUR WORMS:

You can put almost anything in a worm farm. They love fruit and vegetable peels (but I’ve heard they are not big fans of citrus pulp or peels, or spices), crushed egg shells, tea bags, coffee grounds and filters (shredded), shredded newspaper or computer paper, pieces of torn-up cardboard, leaf litter from house plants, vaccuum cleaner bags (emptied and then torn up into digestable pieces, dog or cat hair, waste from dust-pans etc. Things you should perhaps avoid are meats, dairy products, oily foods and grains or fecal matter from pets that have a diet of meat because they may create unwanted smells or attract flies and rodents. It’s obvious but worth stating that we should not add anything that won’t decompose such as glass, plastic tin foil de-worming medicine or pet poo (pets are given de-worming medicine that can be transferred to your wormery, thus killing your worms). Already composted manure should be safe. It’s also a good idea to dust the top of the tray with a handfull of wood ash every now and then to help control oders, and balance the pH of the bedding.

A good rule to follow, is to make sure that your worms get a healthy variety of food, and do not over-feed them. Adding too much waste to a worm-farm, makes it difficult for them to keep up, and smells can occur. A properly managed worm-farm will never smell, is free of bacteria and germs, and provides a healthy amount of completely safe to handle worm castings and worm tea that you can add to your garden.

Worms will self regulate their population so do not worry about an over-abundance of worms. If you feel you have a few too many, share the wealth with a friend. Help them to set up their own worm farm, and get them started with the worms.

MANAGEMENT TIPS:

Although the worms may not survive a winter with temperatures below zero, their eggs will. However, it’s a good idea to move the worm-farm indoors if temperatures will drop too low. However, if your worm farm is small enough and is well managed, it can even be placed under sinks or in a cupboard.

Worms like it to be cool…so it’s best to keep it our worm farm out of the sun. They also hate light, so it would be a good idea to keep an extra cover like a towel, rag or piece of cloth rug underneath the lid with the screen. This will also keep moisture in, and aid in keeping other pests and insects out of the worm’s bedding. Although worms like their abode to be moist, they don’t like it too wet. It should be the consistency of a wrung-out spunge. If it’s too wet, they will drown, and anaerobic conditions can set in causing the worm farm to smell.

When first starting out, make sure you don’t over feed your worms. Keep decomposing kitchen waste to a minimum, and have a larger balance of perhaps moist shredded paper or coffee grounds and perhaps a little soil. If the worms cannot keep up with the amount of food given them, the kitchen waste will start to “gas-off” and it will begin to smell.

If a worm farm becomes too wet, your worms can drown, and anaerobic conditions can set in, again causing the worm farm to smell. Keep an eye on moisture levels. If your worm bedding becomes too dry, your worms will start to die, and the worm farm will start smelling like fish.

Worm farms must be able to get air and moisture, this is why we have the screen on top to allow for air ventilation and moisture management.

It is important to seperate worms from finished compost, or they will begin to die-off, this is why we have a second level for our worms to passively move into on their own. Without this second level, we would have to physically remove the worms on our own…a time consuming task…although with children, it can be a fun learning experience, that will teach them that worms are something to befriend, rather than fear.

After emptying the first layer of worm-castings, be sure to save a little bit to mix in with the decaying matter from the second layer. This will also help to keep the worm-farm from smelling like raw garbage.

When just starting out, you may find that worms want to crawl out of the worm farm. Especially if the balance of food to surface space to worms isn’t right. To remedy this situation, just keep the worms in a well lit area. Because worms hate light, they will not try to crawl out into a lit area. It’s also a good idea to start by covering your worms and kitchen waste with a bit of soil.

Remember, a well managed, well balanced worm-farm will never smell, and will be free of harmful bacteria and diseases. It will take some practice to get it right in the beginning, but just don’t give up if you find your worm farm starts to smell. Do what needs to be done to fix the problem. The very little effort it takes to manage a worm farm is worth it to save the ourselves from greenhouse gasses, and the health hazards (and the expensive hospital bills) associated with landfills and incineration. The bonus is, we get three profitable products in the end, better health and better food from our gardens.

Filed Under: Article Tagged With: soil

Seed Balls

‘Soil’ Articles at Permaculture Reflections

October 17, 2006 by Douglas Barnes Leave a Comment

Masanobu FukuokaSeed balls are a method of plant propagation widely promoted by Natural Farming innovator Masanobu Fukuoka.

Seed balls are simply seeds mixed with equal proportions of dried compost and clay, formed into small balls, and dried for later sowing.

To make them, simply select the seeds to be used – thick-skinned seeds will need to be scarified, and some seeds need heat or cold to bring them out of dormancy. Legumes will require inoculant if they are to fix nitrogen. Also, for species that can benefit from mycorrhizal relationships, adding the spores of mycorrhizal fungi such as the genus Glomus and/or Rhizopogon, species Gigaspora margarita, and/or Pisolithus tinctorus would be beneficial, though not necessary. [This list is not exhaustive, but these are readily available through Fungi Perfecti.]

  • Mix one part seeds with one part dry compost.
  • Next, add one part dry clay and mix.
  • Then spray in water a little at a time and mix it together until you have just enough water to hold everything together without crumbling.
  • After that, form the mixture into balls 2~3 cm in diameter.
  • Finally, dry the balls for later use.
  • Once dried, the balls are ready to be spread over land that you want to plant. When the rains come, the seeds will germinate.

Using this method along with other Natural Farming techniques, Fukuoka san was able to produce 590kg (1300lbs) of winter grain (barley or wheat) and 22 bushels of rice per quarter acre of land. Moreover, these techniques require the labour of just two people working a few weeks a year to attain the crop. There is no plowing, no weeding, no application of biocides in any form, and no fertilising.

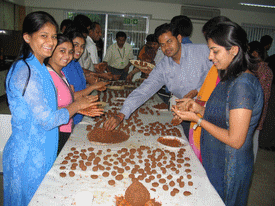
Seed balls may be obscure in North America, but in parts of the world already badly damaged by human activity, their use is easily recognised. The BCIL Alt.Tech Foundation of India uses seed balls to regreen Bangalore. And as most of the planets deserts are the creation of mankind, we can follow their lead to undo the damage we have done.

Imagine tanks used, not for warfare, but to pull land imprinters to give seedballs an advantage. Imaging cluster bombs, not killing, but being used to distribute seed balls over deserts creating green explosions. While some of these ideas may seem unrealistic, they are within the realm of possibility… if we only act.

Filed Under: Article Tagged With: soil

  • 1
  • 2
  • Next Page »

Courses

A Brief Introduction to Permaculture

Design Fundamentals I

Design Fundamentals II

Articles by tag

Getting started

Temperate climate

Tropical climate

Arid climate

Urban permaculture

Design

Earthworks

Energy

Fungi

Home design

Interviews

Land repair

Patterns

Soil

Trees

Water

About TOS Contact Resources
  • Facebook
  • Twitter

Copyright © 2005 - 2025 · EcoEdge Design Ltd.